Author: admin_a2

  • Understanding the Interlocking Mechanism of Modular Storage

    Understanding the Interlocking Mechanism of Modular Storage

    The Basics of Connection

    Modular storage isn’t magic. It is geometry. You have a male end and a female end, or a tab and a slot. The “interlocking” part usually means the pieces hold themselves together once joined, often without screws. I look at the back of a drawer unit. There are usually rails. The rails have holes. The pins on the vertical divider go into those holes. Gravity does the rest, or a small plastic clip snaps in. This is the core of modular storage design. It relies on the parts fitting together so precisely that they don’t need external fasteners to stay put. When you pull the system apart, you are reversing that geometry.

    How the Lock Actually Works

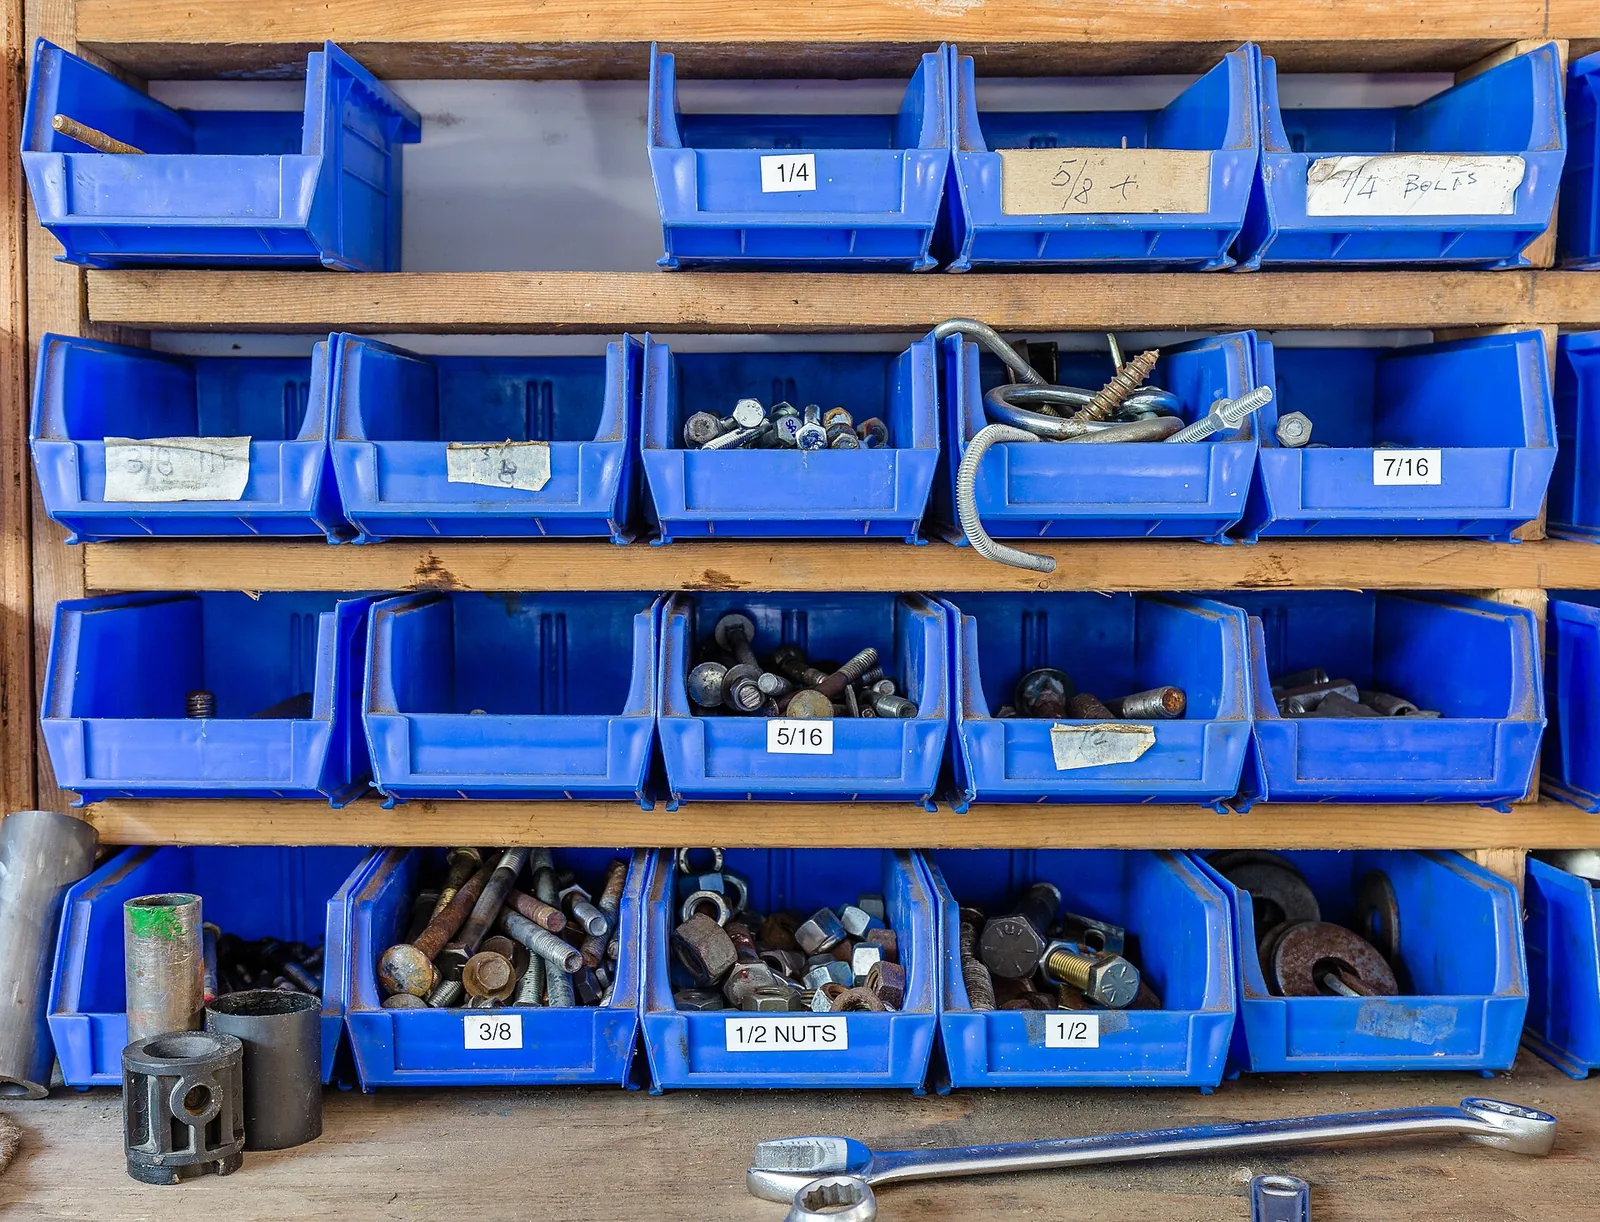
    Most systems use a friction fit. You push down. The plastic bends slightly, then snaps back into a recess. That sound—the “click”—is the only confirmation you get that it’s secure. Some use cam locks. You turn a metal disc, and it pulls two wooden panels tight against each other. Both rely on tension. If the material is too thin, the tension breaks it. I avoid thin particle board for this reason. It crumbles. A good interlocking mechanism uses rigid materials that transfer the load to the floor or the wall, not to the neighboring plastic tab. When you slide a drawer into a closet system, the weight sits on these interlocking organizer parts. If the lock fails, the rack tilts.

    Spotting a Good System

    Pick up a single shelf. Shake it. If it feels like a toy, it won’t hold your winter coats. Look at the connection points. Are they reinforced? Metal inserts are better than just drilling into wood. When you assemble it, the parts shouldn’t fight you. They should slide. If you need a hammer to get the interlocking parts to meet, the tolerances are off. That’s bad engineering. A well-made closet system basics set will have tight tolerances but smooth assembly. You shouldn’t have to force the tab into the slot. It should drop in and stop moving. That lack of movement is what you are paying for.
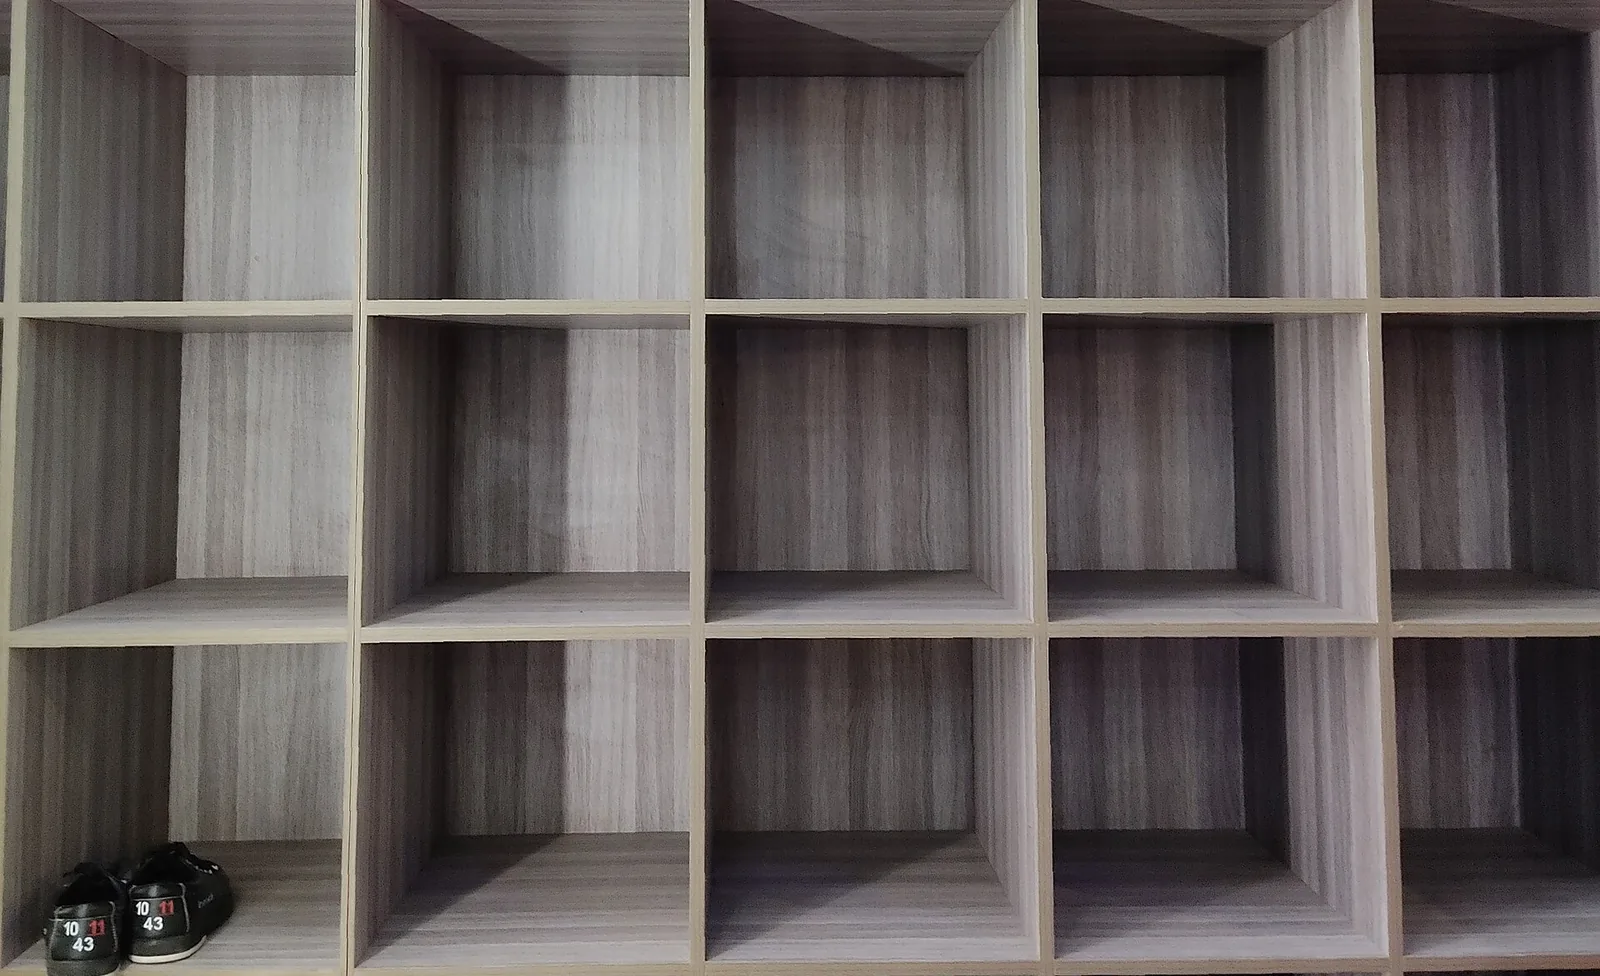
    Where It Fits Best

    Closets are the main use. You stack vertical dividers, then hang horizontal rods on them. The mechanism handles the weight distribution. I’ve seen people try to use these for garage shelving. Sometimes it works, but the static load of tools is different from the dynamic load of shirts bouncing around. Stick to fabric and light boxes. The interlock is designed for stability, not heavy machinery. The system works best when the load is distributed vertically down the columns. If you hang a heavy bag from a single horizontal rod that isn’t supported properly, the interlocking tabs will shear off. Design the layout so the weight goes straight down.

    The Mixing Trap

    This is the biggest mistake. You buy a main unit from Brand X. You need an extra drawer. You buy it from Brand Y because it’s cheaper. They look the same. They aren’t. The interlocking tabs will be a millimeter off. You force it. The plastic cracks. Now you have a broken part and a wobbly tower. Stick to one brand. The tolerances are proprietary. Even a difference of a few millimeters in the modular storage design can ruin the structural integrity. If you mix brands, the system loses its rigidity. It becomes a pile of parts rather than a solid unit. Buy the expansion kit that matches your original model. It saves time and money in the long run.

  • How One Family Maximized a Small Reach In Closet Space

    How One Family Maximized a Small Reach In Closet Space

    The Reality of a 6-Foot Reach-In

    Let’s be honest. Most standard reach-in closets are terrible. They are designed by people who clearly don’t own clothes. The family in this case study—I’ll call them the Millers—had a classic problem. A standard 6-foot wide space with one high bar and one useless shelf. That’s it. Every morning was a frantic struggle. Shoes were piled up in a corner that looked like a landslide waiting to happen. They tried plastic bins. They tried hanging organizers that just ripped off the door. Nothing worked. It felt chaotic. They weren’t looking for a luxury showroom; they just wanted to find their matching socks without a meltdown.

    Ditching the Single Rod

    The first thing we did was ignore the original setup. That single rod running the width of the closet is the enemy of efficient small closet solutions. We ripped it out. The goal wasn’t just to “tidy up”; it was to double the usable surface area. We decided on a modular organizer system. Why? Because if they move, the system moves with them. It’s not built into the drywall. It’s practical. It gives you options.

    Building the Vertical Core

    We installed a vertical tower of drawers right in the center. This is the game changer for a reach in closet makeover. It splits the space but creates a “home” for folded stuff—jeans, t-shirts, stuff that doesn’t need to hang. By putting drawers in the middle, you gain hanging space on both sides. Short hanging on one side (shirts, folded pants), long hanging on the other (dresses, coats). It sounds obvious, but you’d be surprised how many people just stack plastic bins on the floor and call it a day. The drawers slide smoothly. No more yanking a bin out from the bottom of a pile and having everything collapse on top of you.

    The “Almost” Mistake

    They almost made a huge error. They were about to buy a custom built-in system. It looked beautiful in the catalog. But it was expensive and permanent. If their kids grew two inches, the system couldn’t change with them. That’s the beauty of this modular organizer case study: flexibility. We used adjustable shelving brackets alongside the drawers. This means in two years, when the winter coats need more room, they can move a shelf up in about thirty seconds. No drills, no dust. Just a simple adjustment. That’s the value you’re actually paying for—not just the white wire or the finish, but the ability to change your mind later.

    The Morning Result

    It’s not magic. It’s just geometry. The closet holds 30% more clothes now. The floor is visible. The husband told me he actually enjoys looking for socks now, which is a sentence I never thought I’d hear. They spent a Saturday afternoon on it. It wasn’t free, but it costs a lot less than moving to a bigger house just for closet space. The system works because it fits their specific mess, not some idealized version of it.

  • Stackable Bins versus Pull Out Drawers for Closet Efficiency

    Stackable Bins versus Pull Out Drawers for Closet Efficiency

    Defining the Real Problem

    Most closet advice focuses on aesthetics. Matching hangers, color coordination, fold versus hang. That is decoration. Efficiency is about physics and friction. It is about how many seconds it takes to retrieve a single item and how much energy you expend doing it.
    When you look at a standard reach-in closet, the volume is there. The depth is usually twenty-four inches. But the accessibility is terrible. The shelf above the rod is a dead zone. You toss a sweater up there, and it disappears behind a wall of winter coats. To get it back, you have to drag everything out.
    The core issue in any storage solutions review isn’t how much you can fit. It is how much you can use. We are looking for a system that reduces the friction between you and your stuff. You want to see it. You want to grab it. You do not want to kneel on the floor and dig.

    How Bins Actually Behave

    I spent a Saturday afternoon testing a stackable bins vs drawers setup in the garage. I wanted to see how the vertical stacking held up over time.
    Bins exploit the Z-axis. They go up. If you have a twelve-inch clearance on a shelf, a single bin uses twelve inches. Two stacked bins use that same footprint to hold twice the volume. On paper, this is a massive win for density.
    The physical reality is different. To access the bottom bin, you must remove the top one. If that top bin is full of books or heavy denim, it weighs ten pounds. You lift it down. You place it on the floor. You open the bottom bin. You get what you need. Then you reverse the process.
    If you do this once a month, it is fine. If you do it every morning for socks, you will stop using the bottom bin. It becomes a time capsule.
    Clear plastic helps. You can see through the side wall to identify the contents. But visibility fades as the stack gets higher. The top bin ends up at eye level. The bottom bin ends up at knee level. You have to crouch to peer into it. The friction increases with every layer you add.

    The Mechanics of Drawers

    Pull-out drawers change the equation by bringing the contents to you. The mechanism is simple. A glider rail attached to the frame allows the box to slide out.
    I installed a modular unit last month. The action is smooth. You pull the handle, and the drawer moves forward. The contents stay level. They do not shift or tumble. You do not have to lift anything. You do not have to unstack.
    This changes how you organize. Because access is instant, you can pack the drawer tighter. You can stack t-shirts forty high. When you pull the drawer, you can flip through them like a filing cabinet. In a bin, that tight packing would be a disaster. You would have to dump the whole thing out to find the shirt at the bottom.
    The trade-off is static space. Drawers need overhead clearance. You cannot put a shelf three inches above a drawer. It won’t open. You lose that vertical volume above the drawer box to the mechanics of the opening arc. In a small closet, that empty air space feels expensive.

    Where Each System Fails

    Neither system is perfect. The failures usually come from misapplication.
    Bins fail at frequency. I used a stackable bin for my daily vitamins. Within a week, I stopped taking the bottom bottle out. I just stopped using it. The effort-to-reward ratio was upside down for a task I do twice a day.
    Bins also suffer from “the crush effect.” If you have a soft bin, like fabric, the weight of the items above compresses the items below. Delicate things get wrinkled or misshapen. Hard plastic bins solve this but introduce the weight problem mentioned earlier. A hard plastic bin falling off a shelf can break your toe.
    Drawers fail at cost and installation. They are not cheap. A quality set of pull-out drawers can cost three times as much as a set of plastic bins. They also require a mounting point. If you have wire shelving, you need a retrofit kit or a complete replacement. If the installation is slightly off, the rails bind. The drawer sticks. You have to yank it. That defeats the purpose of low-friction access.
    Drawers also have a weight limit. I overloaded a deep drawer with heavy cast-iron skillets. The bottom sagged. The rollers started to groan. It worked, but it felt like it was dying. A plastic bin would have held the weight without complaint, though accessing the pans would have required a forklift.

    The Decision Framework

    To choose between these two, ignore the marketing photos. Look at your hands.
    Ask yourself how often you touch the item. If the answer is “daily,” it needs to be in a drawer or on an open shelf. The friction of unstacking a bin is too high for daily use. Socks, underwear, gym clothes, and cookware belong in drawers.
    If the answer is “seasonally,” bins win. Holiday decorations, tax documents, or winter gear. You touch these things once or twice a year. You do not mind lifting a heavy box to get them because you do it so rarely. The vertical density you gain from stacking is worth the effort.
    Look at your floor space. Do you have room to kneel? If you have a small closet where you can’t easily crouch, stacked bins are dangerous. You will be balancing a heavy bin on one knee while rummaging with the other hand. In that scenario, pull-out drawers are a safety issue, not just a convenience.

    The Verdict

    The best closet efficiency comparison usually ends up with a hybrid approach. You use the drawers at waist and chest height for the high-frequency items. You reserve the high shelves for the stackable bins.
    I pulled the trigger on a hybrid system last week. The top two shelves are lined with clear bins for seasonal gear. The lower section is pull-out drawers for daily wear. It works.
    The drawers glide. The bins stack. I know exactly where my winter coat is, and I can grab my running shorts in two seconds without bending over. That is efficiency. Not looking perfect, but moving fast.

  • The Best Methods for Deep Cleaning Modular Closet Systems

    The Best Methods for Deep Cleaning Modular Closet Systems

    Clear the Deck

    Empty the closet completely. I know, it sounds like a headache, but you cannot deep clean around a pile of sweaters. Pull everything out. Toss it on the bed or pile it in the corner. This gives you access to the back corners and the floor tracks where dust bunnies actually live.
    Open a window if you can. Cleaning chemicals, even mild ones, get stuffy in a small space. Grab your vacuum cleaner with the hose attachment. You want to suck up the loose dust before you introduce any moisture. Once dust gets wet, it turns into mud. Mud is harder to clean than dust.

    The Scrub Down

    Most modular systems use a mix of laminate, melamine, and sometimes metal wire. Check your manufacturer’s guide, but generally, you want a mild detergent. Warm water and a few drops of dish soap work fine. Avoid bleach or abrasive scrubbers. They will dull the finish.
    Cleaning closet organizers requires a specific order of operations. Start at the top shelf. Dust falls down. If you clean the bottom first, you will just have to do it again. Wipe the laminate surfaces with a microfiber cloth. It picks up grime without scratching.
    If you have removable drawers, take them out. It is much easier to clean a box on the floor than one inside a cabinet. Wipe the interior and exterior. Don’t soak the wood or composite board. Excess water causes swelling. The drawers might not fit back in if the edges puff up. Ring out your cloth until it is just damp.

    Hardware and Tracks

    The moving parts take the most abuse. Check the drawer slides and closet door tracks. They collect hair and debris. Use a vacuum crevice tool to get into the tight spots. If you use a lubricant, be careful. WD-40 can attract dust over time, creating a gummy paste. A dry silicone spray is a better bet for modular storage maintenance. It keeps things sliding without the mess.
    Tighten any loose screws while you are in there. Modular systems rely on tension and alignment. Over time, the vibration from opening drawers loosens connections. A simple turn of a screwdriver can stop a wobbly shelf from getting worse. Inspect the wall anchors. If a shelf feels heavy or pulls away from the wall, re-secure it immediately.

    Handling Stubborn Spots

    Sometimes you encounter sticky residue from price tags or adhesive hooks. Do not scrape it with a metal tool. You will scratch the laminate. Use a plastic putty knife or your fingernail. Apply a little rubbing alcohol or Goo Gone to the spot. Let it sit for a minute. The adhesive should break down.
    If you find mold or mildew, usually in the bottom corners, address it fast. Wipe the area with a diluted vinegar solution. It kills the spores without damaging the material. Dry it thoroughly afterward. Mold loves moisture. If you leave the wood damp, it will come back.

    Dry and Reassemble

    Do not rush the drying process. This is the step most people skip. Let the shelves and drawers air dry completely. Even if the surface feels dry to the touch, the core might still be wet. Putting clothes back on damp shelves creates a musty smell.
    Once everything is dry, slide the drawers back in. Listen to the sound. Smooth, quiet operation means you did a good job. Rattling or grinding suggests there is still debris in the track or a misalignment.
    Following these deep cleaning tips once or twice a year extends the life of the system. It keeps the air fresh and protects your clothes from dust and pests. A clean closet just works better.

  • Troubleshooting Common Stability Issues in Modular Drawer Towers

    Troubleshooting Common Stability Issues in Modular Drawer Towers

    What “Stable” Actually Means For Drawer Towers

    A modular drawer tower is basically a tall stack of light frames that rely on four things to stay solid in real life. Not in the product photos. On an actual floor.

    • A flat base that sits fully on the floor, no rocking
    • Square geometry, the side panels are not twisted
    • Even drawer fit, each drawer rides level and doesn’t scrape
    • Sensible loading, heavier stuff low and centered
      When people say “it wobbles,” they usually mean one of two feelings. It rocks at the base when you push a corner. Or the whole tower leans and sways when you pull a drawer. Those are different problems, and the fixes are different too.
      One detail I didn’t appreciate until I owned a couple of these. Most modular towers get less stable the taller you build them, even if each individual module feels fine by itself. The stack adds leverage. A tiny base problem turns into a big top wobble.

    Why Drawer Towers Wobble And Drawers Misalign

    Stability issues come from a few common mechanisms. If you can identify which one you have, the repair takes minutes instead of hours.

    • Uneven floor or soft floor surface
      Carpet and foam mats are the worst. A “flat” tower can still sink unevenly, then it twists.
    • Racked frame from assembly or moving
      If you ever picked the tower up from one side, you can torque it slightly. Plastic frames especially can hold that twist.
    • Drawer rails fighting the frame
      A drawer that rubs on one side acts like a pry bar. Every open and close pushes the frame out of square.
    • Weight distribution and drawer momentum
      Put a 12 lb load in the top drawer and the tower starts behaving like a top-heavy filing cabinet. Pull that drawer fast and the tower wants to follow it.
    • Weak connections between modules
      Some modular systems “stack” more than they “lock.” If the top can slide a quarter inch, you’ll feel it.
      A quick way to diagnose in under a minute.
    1. Empty the top two drawers. Don’t skip this.
    2. Put one hand on the top and gently push left and right.
    3. Now press down on each corner of the base, one corner at a time.
      If it rocks when you press a corner, you have a floor contact problem. If it doesn’t rock but sways at the top, you have a height and bracing problem or a loose stack connection. If it feels okay until you pull a drawer, you likely have alignment or load issues.

    Stability Benchmarks You Can Check At Home

    You don’t need fancy tools. I usually use a $10 torpedo level, a tape measure, and a couple of shims. Even a folded index card works as a shim in a pinch.
    Here are the checks that actually correlate with real stability.

    • Rock test
      With drawers closed, you should not be able to rock the tower by pushing a top corner with normal hand pressure.
    • Plumb check
      Put a level on the side wall of the tower. If it’s leaning more than a tiny bit, it will feel worse every time you open drawers.
    • Drawer gap check
      Look at the gaps around each drawer front. If one side gap is noticeably tighter, the frame is out of square or the drawer is riding crooked.
    • Slide feel
      A good drawer feels smooth for the first inch and stays smooth to full open. If it gets tight halfway, the rails are misaligned or the frame is twisted.
    • Load sanity rule
      In my own setup, I try to keep heavy items in the bottom third of the tower, and I avoid loading any single drawer so heavy that it takes two hands to pull. That one habit prevents a lot of “mystery wobble.”
      Here’s a simple troubleshooting table I wish I had the first time.
      | Symptom | Most likely cause | Fix that usually works |
      |—|—|—|
      | Rocks when you press one corner | Uneven floor contact | Shim one foot, add rubber pads, relocate off thick carpet |
      | Sways at the top, base feels planted | Stack too tall, weak module lock | Add wall anchor or anti tip strap, add rear brace, reduce height |
      | One drawer scrapes on one side | Frame racked, rail clip not seated | Re square the frame, reseat rails, tighten fasteners |
      | Drawers pop open or won’t stay shut | Leaning forward, overstuffed | Re level, reduce load, add drawer stops if available |
      | Tower twists when you pull a drawer | Heavy top drawer, no anchoring | Move weight down, anchor to wall, open drawers one at a time |

    Fixes That Work In Real Rooms

    These are the fixes I use in order, because they build on each other. Stop when the tower feels stable. You don’t need to do everything.

    1) Fix the base contact first

    Most wobble starts at the floor.

    1. Empty the drawers enough that the tower is light.
    2. Slide it into its normal spot.
    3. Press down on each base corner to find the “high” corner.
    4. Shim the opposite low corner until rocking stops.
      If you’re on medium pile carpet, the tower can still feel fine for a day and then start wobbling again as it settles. Two things helped me.
    • Put a thin, hard board under the tower, like a cut piece of plywood or a spare shelf panel
    • Add rubber furniture pads under the base corners so it grips instead of skating
      If you can move the tower 2 inches and it gets worse or better, that’s a floor issue, not an assembly issue. Floors are weird. Apartments are extra weird.

    2) Re square the frame if drawers bind

    If a drawer is rubbing, fix that early. A rubbing drawer keeps re introducing twist.

    1. Pull all drawers out and set them aside.
    2. Check for any clips that are not fully snapped in. You can usually feel it with a thumb push.
    3. Loosen the connecting screws or fasteners slightly if your model has them.
    4. Push the frame into square by pressing opposite corners, like you’re straightening a picture frame.
    5. Re tighten, but don’t crank it. Over tightening can warp plastic.
      Then test one drawer. If it slides smoothly, add the rest.
      A small, practical tip. If the drawer rides on plastic rails, a tiny wipe of dry lubricant helps. I use graphite or a silicone dry spray, very light. Avoid oily sprays. They attract dust, then you get gritty rails.

    3) Lock modules together so they can’t creep

    Some “modular” towers stack with gravity and maybe a couple of tabs. That’s fine until you build higher.
    If your system includes connector clips, use every single one. If you’re missing a clip, the stack will drift over time.
    If you don’t have clips, you still have options that don’t look messy.

    • Two small L brackets at the back, one on each side, tying upper and lower modules together
    • A wide hook and loop strap around the back uprights, pulled snug
    • A simple rear panel, even thin hardboard, screwed into the back of the frame if the design allows it
      Rear bracing matters because it stops the “parallelogram” effect. That’s the sway you feel when the tower looks square but behaves like it’s hinged.

    4) Anchor for safety when height goes up

    If the tower is tall enough that the top is around chest height, I treat it like a bookcase. Anchor it.
    This is not about perfection. It’s about preventing a tip if a kid climbs or someone yanks a loaded drawer.

    • Use an anti tip strap to a wall stud if possible
    • If you can’t hit a stud, use the best drywall anchor you’re comfortable with and keep loads lighter
    • Anchor high, near the top of the tower, so the strap actually resists tipping
      In my place I noticed a big difference even with a single strap. The sway dropped immediately.

    5) Adjust how you load it, it changes everything

    A modular tower can feel “broken” when it’s just overloaded in the wrong place.
    What I do now.

    • Heavy stuff low, light stuff high
    • Avoid storing dense items like tools, coins, or full bottles in top drawers
    • Don’t open two heavy drawers at once
    • Leave a little headroom in each drawer so items don’t wedge and force the drawer out of track
      If you want a simple packing pattern, try this.
    • Bottom drawers for heavier, bulky items
    • Middle drawers for medium weight daily use stuff
    • Top drawers for light items like paper, cables, or accessories
      It sounds obvious, but it’s the difference between “wobbly tower” and “fine for years.”

    Common Misconceptions And The Fastest Path To A Reliable Setup

    A few beliefs keep people stuck in the wobble loop.

    • “If I tighten harder, it will stop wobbling”
      Sometimes it helps. Sometimes it warps the frame and makes drawer alignment worse.
    • “The tower is defective”
      It can happen, sure. But in my experience the floor is the usual culprit, especially with carpet or older flooring.
    • “A little sway is normal”
      A tiny amount is common. But if you feel the top move when you open a drawer, that’s a safety and annoyance problem you can improve.
    • “I need special parts”
      Often you don’t. Shims, pads, and a basic anti tip strap solve most cases.
      If you want the quickest path that usually works, do it in this order.
    1. Level the base with shims or pads.
    2. Fix any rubbing drawer by re squaring and reseating rails.
    3. Lock modules together so the stack can’t slide.
    4. Anchor if the tower is tall or in a high traffic spot.
    5. Reload with heavy items low.
      If after all that the frame still twists when you pull one drawer, the tower might be too tall for the design in that location. Shortening it by one module can be the cleanest fix. It’s annoying, yeah. But it works, and it’s cheaper than living with a wobbly, cranky drawer tower every day.
  • Free Printable Checklist for Your Modular Organizer Shopping Trip

    Free Printable Checklist for Your Modular Organizer Shopping Trip

    What This Checklist Actually Covers

    A modular organizer shopping trip goes sideways in predictable ways. You buy bins that don’t fit the shelf depth. You forget the one weird corner. You get home and realize you measured with the tape at an angle.
    This closet organizer checklist is built around three things you can verify with your hands.

    • Space facts you can measure and re-check
    • Stuff facts you can count and touch
    • Hardware facts you can match to the system you’re buying
      Before you print anything, walk to the closet and do one small action. Open the door, pull one drawer all the way out, then shut it. If the drawer rubs, if the door swings into a hamper, if the baseboard sticks out, write that down. Those little frictions decide what “modular” will actually work in your room.
      Core pieces to plan for when you’re looking at Modular Drawer & Closet Organizers.
    • Drawer units or cube frames
    • Bins, dividers, and trays
    • Labels
    • Mounting or anchoring parts if the unit needs them
    • “In-between” items you forget, like shelf liners or drawer stops
      Not glamorous. Practical. That is the point.

    How Modular Systems Win or Lose in Real Life

    Modular organizers feel flexible because you can stack and swap parts. In practice, they behave more like a set of fixed limits.
    Here’s what changes everything.

    • Depth decides whether hangers clear the back wall and whether drawers can open fully. Put your tape measure on the side wall, press it flat with your thumb, and read the number without leaning in.
    • Door swing decides whether you can access bins without doing a side-step every morning. Stand where you normally stand and open the door with one finger. Watch what it hits.
    • Vertical clearance decides whether stacking is real or just a picture on a box. Reach up and feel for the top shelf lip or the closet rod bracket.
      Modular drawer systems also have their own “math.” A bin might fit the width but still fail because the drawer sides taper or because the handle steals space. If you can, bring one example container from home. A small one is enough. Set it inside the display drawer in the store and slide the drawer closed. If it catches, you learned something before you bought a whole set.
      One more action that saves time later. Take two photos.
    • One photo of the empty closet, taken straight on.
    • One photo of the mess pile you’re trying to control, taken from above.
      Those photos turn your shopping trip into a matching exercise instead of a vibe-based purchase.

    Fit and Feature Checks While You Shop

    In the store, your brain will lie to you. Everything looks like it will fit because it is sitting in open air. Use a short routine.
    Touch the materials. Then do a simple stress check.

    • Grab a drawer front and pull. Not gently. If it flexes, notice where it bends.
    • Press down on a shelf panel with your palm. If it bows when you lean a little weight, it will bow more under stacked jeans.
    • Twist a bin corner with two hands. If it squeaks like crazy, you may still buy it, but you will hear that squeak at 6 a.m.
      Look for these make-or-break details.
    • Drawer stops that keep you from pulling the whole drawer into your lap
    • Adjustable dividers that lock in place, not just “float”
    • Label surfaces that actually accept a sticker without peeling
    • Feet or levelers if your closet floor is uneven, many are
      Bring your measurements out in the open. Pull out your phone, open Notes, and compare line by line. This is where a modular storage shopping list helps, because it keeps you from buying the “almost right” piece just to end the decision.
      If you only do one store test, do this. Put your hand on the bottom of a display bin and rub your thumb across it. If the plastic edge is sharp, it can snag delicate fabric. If it is rough, it will collect dust faster. Not a dealbreaker, just information.

    The Printable Checklist You Can Take Along

    Print this, or copy it into your notes app. It’s designed to be a one-page tool. If you want it cleaner, paste into a doc and print at 90 percent.
    This is one of those printable organization tools that earns its keep because it forces you to slow down for thirty seconds.
    A. Closet and Room Measurements

    • ___ Closet interior width
    • ___ Closet interior depth
    • ___ Floor to underside of top shelf
    • ___ Floor to closet rod
    • ___ Door swing clearance, where the door stops
    • ___ Baseboard depth, measure how far it sticks out
    • ___ Any obstructions you can touch, outlets, vents, brackets
      Action in the aisle. Put your tape on a shelf sample and practice reading it fast. Sounds dumb. It’s how you avoid transposing numbers later.
      B. What You’re Storing, Quick Counts
    • ___ Hanging shirts count
    • ___ Hanging pants count
    • ___ Dresses or long items count
    • ___ Folded items stacks, jeans, tees, sweaters
    • ___ Socks and underwear, estimate by “loads” if you don’t want to count
    • ___ Accessories, belts, hats, bags
    • ___ Shoes pairs, include the ones by the door
      Action at home before you leave. Grab one laundry basket, dump it on the bed, and sort into three piles. Hang, fold, toss. You’ll shop differently.
      C. Modular Pieces to Compare in Store
    • ___ Drawer unit width and depth matches space
    • ___ Drawer interior dimensions, not just outside dimensions
    • ___ Bin sizes available and whether you can buy singles later
    • ___ Divider options for small items
    • ___ Label method you will actually use, stickers, tags, clip-ons
    • ___ Stackability limits you can confirm by touching the display
    • ___ Anchoring or anti-tip option if you have kids or pets
      Action at the display. Try to wobble the assembled unit with one hand. If it rocks, picture it loaded.
      D. Materials and Maintenance
    • ___ Can you wipe it with a damp cloth without it staining
    • ___ Does it attract dust, rub your finger across a dark sample
    • ___ Will fabric items snag on edges
    • ___ Are parts replaceable, or is it “whole set only”
    • ___ Smell check for plastics if you’re sensitive, lean in and sniff
      That smell test feels awkward. Still do it.
      E. Checkout Double Check
    • ___ Count boxes against your list before you pay
    • ___ Confirm you have all hardware bags if they are separate
    • ___ Keep the receipt somewhere you can find in two weeks
    • ___ Take a photo of the SKU tags if returns are likely
      If you’re using this as a closet organizer checklist, don’t skip the checkout step. This is where missing brackets happen.

    Common Mistakes and a Better Next Step

    Mistake one. Measuring only the “big rectangle” and ignoring the weird bits. Closet rods are not centered. Baseboards shove units forward. Doors steal space.
    Fix. Get on the floor and measure at the baseboard line, not at chest height. Put the tape against the wall and press it flat.
    Mistake two. Buying containers before you decide what the containers are for. Then you own twenty shallow trays and none of them fit socks the way you fold them.
    Fix. Pick one category and test it. At home, fold five shirts your normal way. Stack them. Measure the stack height with your tape. Now you’re shopping with a real target.
    Mistake three. Over-building a system that only works on your best day. Perfectly labeled drawers. Tiny compartments. It looks sharp for a week. Then you get busy.
    Fix. Leave some slack. Plan one “junk buffer” bin on purpose. Put it low. When you catch yourself stuffing random stuff into a neat drawer, you’ll feel it and redirect.
    Mistake four. Ignoring how you actually move. If you always drop your keys in the same spot, a drawer across the closet isn’t a solution.
    Fix. Stand at your closet entrance and mime your routine. Shoes off, jacket off, bag down. Put the high-use zone where your feet already go.
    A good next step is small. Print the checklist, grab your tape, and do a five-minute pass tonight. If you only capture width, depth, and door swing, that’s enough to keep your shopping trip grounded. Then your modular choices become simple matching, not guesswork.

  • Plastic Versus Wood Closet Organizers Which Material Lasts Longer

    Plastic Versus Wood Closet Organizers Which Material Lasts Longer

    Defining Durability Beyond Just Years

    When we talk about closet organizers lasting a long time, most people just think about years of use. It is actually more complicated than that. Durability involves structural integrity, resistance to environmental stress, and how well the material handles heavy loads without sagging or cracking. A system that falls apart after three years because it got damp is not durable, even if it looked great on day one. I have installed dozens of these systems in different homes, and the environment plays a huge role in what counts as “lasting.”
    You need to look at two main factors. First, the static load weight. This is the weight of the clothes sitting there for months. Second, the dynamic stress, which happens when you yank a sweater out or slam a drawer. Plastic handles dynamic stress differently than wood. We need to set a baseline that accounts for both the material strength and the conditions of your specific closet before picking a winner.

    How Plastic and Wood Actually Perform

    Let’s break down what happens when you fill these organizers up. I have worked with both materials extensively in remodels, and the behavior is distinct.
    Plastic Organizers
    Most residential plastic organizers use PVC or high-impact polystyrene. The good stuff is reinforced with metal bars.

    • Water Resistance: Plastic wins here without a doubt. It does not care if you hang a damp towel or if your closet humidity hits 70 percent. It will not rot, mold, or warp.
    • Weight Limits: This is where it gets tricky. Standard plastic kits usually max out around 50 to 75 pounds per linear foot for shelving. If you stack heavy winter coats, the span might sag over time. I have seen plastic shelves start to bow after just two years of holding heavy denim jeans.
    • Wear and Tear: Plastic becomes brittle. UV light is the enemy, but even in a dark closet, the polymer chains break down slowly. After about five to seven years, plastic clips can snap if you try to rearrange the system.
      Wood Organizers
      When I say wood, I am talking about solid plywood or real hardwood, not particle board covered in vinyl. Particle board is the stuff that crumbles if it gets wet.
    • Structural Strength: Wood is inherently stronger for shelving. A 12-inch deep shelf made from 3/4-inch plywood can support over 100 pounds per foot without visible sagging. It feels sturdier when you use it.
    • Environmental Sensitivity: Wood breathes. In humid summers, it expands. In dry winters, it shrinks. If the finish is not good, this movement can cause warping or cracks in the joinery.
    • Longevity: A well-sealed wood system can last decades. I have taken out cedar closets that were fifty years old and still structurally sound. However, if a pipe bursts overhead, untreated wood is ruined in hours, whereas plastic just needs a wipe-down.

    When Humidity Decides the Winner

    Your local climate is the tie-breaker here. I have seen beautiful wood installations ruined simply because they were in the wrong room.
    If you live in a coastal area like Florida or anywhere with high humidity, plastic is often the smarter choice. Even with climate control, closets are often unconditioned spaces. The moisture in the air will eventually get into the wood. I worked on a project in a beach house where the custom wood shelving expanded so much it popped the mounting screws out of the wall within a year. We replaced it with a high-grade ventilated wire and plastic system. It has been there for three years with no issues.
    Conversely, if you are in a dry climate like Arizona or have a very well-sealed interior closet, wood is superior. The dry air keeps the wood stable. The aesthetic of wood adds real value to the home that plastic cannot match. For reach-in closets located in interior hallways away from bathrooms, I almost always recommend wood. It holds the wardrobe shape better and does not have that “temporary” feel that plastic grids sometimes have.

    Weighing Cost Against Replacement Frequency

    Money is always part of the decision. You need to look at the total cost of ownership over a ten-year period.
    Plastic Economics
    A typical 6-foot closet kit from a big-box store costs between 80 and 150 dollars. Installation is DIY-friendly and takes about two hours. If it lasts 7 years before becoming brittle or outdated, your annual cost is very low. If a clip breaks, you can usually buy a replacement part for a few dollars. It is a low-risk investment.
    Wood Economics
    Custom or high-end modular wood systems range from 300 to over 1000 dollars for the same space. Installation might require a carpenter unless you are handy with a saw and level. However, that system adds equity to your house. If you sell the home, buyers see “built-in wood storage” as a feature. If you replace a plastic system, buyers see a closet.
    Here is the reality check. If you are a renter or plan to move in less than five years, buy the plastic. It is easy to take apart and move. Wood systems are often screwed into studs and painted, making them difficult to remove without damage. If you own your home and plan to stay for ten years, wood is cheaper in the long run because you will not replace it.

    Picking the Right System for Your Space

    So, which one lasts longer? Physically, wood can outlast plastic by decades if the conditions are right. Functionally, plastic often outlasts wood in harsh environments like garages, basements, or damp attics.
    Choose Plastic If:

    • The closet is in a garage, basement, or laundry room.
    • You live in a very humid region.
    • You need a flexible system you might reconfigure next year.
    • Your budget is tight and you need a solution right now.
      Choose Wood If:
    • The closet is a main bedroom or walk-in.
    • You want the storage to increase home resale value.
    • You have heavy items, like winter coats or boots, to store.
    • You live in a dry, climate-controlled environment.
      I generally tell clients to mix them. Use a solid wood shelving rod for hanging clothes to prevent sagging, but use plastic bins or drawers for accessories on the floor. This gives you the structural benefit of wood where it counts and the durability of plastic where water damage might occur. Measure your space twice, check the humidity levels, and pick the material that fits the reality of your home, not just the catalog picture.
  • Before and After Transformations Using Basic Modular Drawer Systems

    Before and After Transformations Using Basic Modular Drawer Systems

    Why the “Before” Always Looks the Same

    We all know the feeling. You open a drawer, and it’s a chaotic abyss. Socks are tangled with t-shirts, cables are knotted like fishing line, and that one specific tool you need is buried at the very bottom. It’s frustrating. Usually, the “before” state isn’t just messy; it’s dysfunctional. You waste ten minutes every morning just finding socks that match. That’s dead time. Most people think the solution is buying a bigger dresser or throwing things away, but the real issue is often just the lack of structure inside the space we already have. A deep, empty drawer is basically a trap for clutter.

    The Mechanics of a Basic System

    You don’t need a custom carpenter or a expensive renovation crew. Basic modular drawer systems work on a simple principle: segmentation. Think of it like creating a grid. You take a wide, open space and break it down into manageable zones. Most systems use a mix of interlocking dividers, stackable bins, or adjustable trays. The “modular” part is key. If you buy a pre-made organizer with fixed slots, you’re stuck with that layout. But with a modular system, if your sock collection changes or you decide to store office supplies instead of underwear, you just move the pieces around. It’s flexible. Ideally, you want a system that fits the dimensions of your drawer exactly, so things don’t slide around when you close it.

    Real-World Transformations

    Let’s look at a kitchen pantry. Before the makeover, it was a disaster. Spices were lost behind boxes of pasta, and finding a specific can of beans meant pulling everything out. After installing a few modular drawer units with tiered steps and clear dividers, the change was instant. You can see every spice jar label at a glance. Nothing gets lost in the back.
    Now consider a bedroom closet dresser. The “before” was a pile of folded jeans that toppled over every time you grabbed a pair. By adding vertical dividers—essentially creating little shelves for each pair of jeans—the stack stays upright. You pull one pair out, and the others remain standing. It’s a small mechanical change, but it stops the daily annoyance of refolding clothes. The visual proof is striking: a drawer that looks calm instead of aggressive.

    What Actually Fits Inside

    This is where most people mess up. They buy organizers without measuring their actual stuff. You have to be realistic about volume. A standard modular drawer unit might look great on the shelf, but if your hoodies are thick, they won’t fit into a 4-inch high bin.
    Small items like batteries, pens, and charging cables need small, tight compartments. If you put a single AA battery in a large 6×6 inch bin, it will just rattle around and get lost again. Conversely, trying to stuff bulky winter sweaters into small segmented cubes is a losing battle. Compression helps, but you need the right container size for the job. Measure the tallest item you plan to store and ensure your drawer depth can accommodate it with a little bit of clearance. If it’s a tight squeeze, you’ll never use the system.

    Common Mistakes to Avoid

    The biggest trap is organizing before decluttering. If you install a fancy modular system and then fill it with junk you don’t need, you just have organized junk. Pull everything out first. Get rid of the expired coupons, the socks with holes, and the duplicate tools. Only then should you start placing the modules.
    Another mistake is over-complicating the setup. You don’t need a complex configuration for a junk drawer that holds random screws and rubber bands. A simple, broad divider or two loose bins will do the job. Don’t over-engineer it. The goal is to grab things without thinking, not to create a puzzle you have to solve every time you need a pen. Keep it simple. If the system feels like a chore to maintain, you’ll stop maintaining it within a week.

  • Step by Step Guide to Planning Your Modular Closet Layout

    Step by Step Guide to Planning Your Modular Closet Layout

    Empty the Space First

    You can’t plan around clutter. Pull everything out. Pile it on the bed or stack it in the hallway. It looks like a mess. That is fine. You need to see the bare bones of the closet.
    Check the back wall. Look for patchy paint or old holes from previous organizers. Those holes tell you where the studs used to be, or where someone missed them. If the wall is damaged, note it. You will be covering most of it, but deep craters affect how the new tracks sit.
    While it is empty, clean the floor. Dust bunnies and old hangers accumulate in corners you can’t reach when the closet is full. Sweep it out now. Once the new modular storage installation starts, you won’t want to stop to clean.

    Measure the Walls, Not Just the Opening

    Walls lie. They look flat, but they aren’t. Grab a tape measure. You need the width at the top, the middle, and the bottom. Write down all three numbers. If they differ by more than half an inch, your closet is out of square.
    This matters for fillers. Modular systems often need thin strips to close gaps between the unit and the wall. If you only measure the opening width, you might buy a unit that is too wide to slide in.
    Don’t forget depth. Standard closets are often 24 inches deep. Some are 18. If you put a 24-inch drawer in an 18-inch closet, it won’t close. Measure from the back wall to the face of the door frame. Be precise.

    Sort Your Gear by Type

    Look at the pile on your bed. Separate the hanging items from the folded items.
    Long dresses and coats need vertical space. If you plan a shelf 48 inches up, a winter coat will hit it. Short items like shirts and pants can stack. You can fit two hanging rods—one high, one low—in the space of one long hang section.
    Now look at the folded stuff. Sweaters, jeans, t-shirts. Do you stack them on shelves or throw them in drawers? Drawers hide mess. Shelves are faster. If you have lots of small items like socks or underwear, you need drawers or bins. If you mostly stack jeans, open shelves work fine.
    This step dictates your closet layout planning. If you have 90% hanging clothes, don’t design a wall of drawers. You will regret it.

    Choose the Right Components

    Modular systems are mix-and-match. You pick the towers, the drawers, and the rods.
    Drawers are the heavy lifters here. They are also the most expensive part. Use them for things you want to hide. Use open shelves for things you use daily. It is easier to grab a shirt from a shelf than to pull a drawer out, unstack the shirts, and grab one.
    Consider shoe storage. Shoes take up a lot of room. A slanted shoe rack saves floor space but can let heels fall through. Flat shelves are safer but hold fewer pairs. Measure your shoe collection. Do you have big boots? Standard cubbies won’t fit them. You will need a dedicated tall cubby or floor space.

    Watch for Obstructions

    Open the closet door. Watch the swing arc. Does it hit the wall? If you install a tall cabinet or a laundry hamper too close to the door hinge, the door won’t open fully.
    Check the ceiling. Is there a soffit? A bulkhead? Light fixtures? You cannot mount a hanging rail into a light fixture. You might need a short vertical section to bridge the gap around a fixture.
    Baseboards are another trap. Most closet towers sit on the floor. If your baseboard is thick, the tower might lean forward, leaving a gap at the top. You either need to scribe the back of the unit to the wall or use a spacer behind it to keep it plumb.

    Dry Fit the Design

    Do not buy anything yet. Sketch it out on paper. Or use painter’s tape on the back wall.
    Mark the height of the hanging rods. Mark the width of the towers. Stand in the empty closet. Reach up. Can you grab that high rod? Is it too low? Will a hanger hit the shelf below?
    This is the time to catch mistakes. It is easier to move a line of tape than to uninstall a mounted rail. Imagine reaching for a pair of socks in the morning. Is the drawer in a comfortable spot? If it is too high or too low, you won’t use it.

    Finalize the Order

    Now that you have the measurements and the sketch, you can list the parts. Be specific. You need two 24-inch towers, one 36-inch extension, three 12-inch drawers, and two closet rods.
    Check the installation instructions for the specific system you chose. Some require a top track for support. Some hang from a rail. Some stand on the floor. Ensure you have the right mounting hardware for your wall type—drywall anchors are weak. Find the studs.
    Buying a little extra is okay. An extra shelf or a few extra clips usually come in handy. But don’t overbuy. Modular systems are designed to be expandable. You can always add more drawers later if you need them.

    Install and Adjust

    Mount the standards or the hanging rail first. Get them level. If the rail is crooked, the whole closet will look wrong. Use a laser level or a long spirit level.
    Slide the units in. Hang the rods. Put the clothes back.
    It might feel tight at first. You might find you need to move a rod up two inches. That is normal. Modular storage installation is not permanent. Loosen a screw, shift the bracket, tighten it down.
    Step back. Look at the empty floor space. Look at the organized rows. It works.

  • Avoid These Seven Common Mistakes When Buying Modular Drawer Organizers

    Avoid These Seven Common Mistakes When Buying Modular Drawer Organizers

    Measure the Inside, Not the Outside

    I get it. You grab a tape measure, you stretch it across the front of your dresser, and you buy the thing that fits. That’s how you buy a t-shirt, right? But drawers are not t-shirts. If you measure the outside face of the drawer, you are setting yourself up for failure. The inside is almost always smaller because of the thickness of the sides and the slides. You need to measure the usable space at the very back and the very front. Sometimes they are different. If you don’t check this, your brand new organizer will scrape against the sides every time you try to slide it in. It’s a terrible sound.

    Watch the Drawer Depth

    This is the silent killer of organization projects. You find these beautiful, tall bamboo dividers that look like they belong in a magazine. You buy them. You bring them home. You put them in the drawer. And then… the drawer won’t close. The organizer hits the underside of the countertop. You have two choices now: leave the drawer open like a gaping wound, or return the thing. Always check the vertical clearance. If you have under-mount slides, you usually have more room. If you have standard side slides, you lose precious height. Don’t guess.

    Don’t Organize Your Trash

    Here is a mistake I see constantly. People buy the organizers before they sort their stuff. They are excited. They want the “after” picture immediately. So they take the mess—crayons, dead batteries, tangled cables—and they neatly arrange it into expensive little plastic boxes. Congratulations, you now have organized garbage. You must purge first. Take everything out. Be ruthless. Throw away the dried-up highlighters. Donate the duplicate chargers. Once you see what you actually have left, you might realize you don’t even need to buy that 50-piece set.

    The Fidget Factor

    There is a trend on social media right now for these incredibly complex modular systems with dozens of tiny little bins. It looks satisfying in a 15-second video. In real life, it is a nightmare. If you want to grab one pair of socks, you have to lift out four different tiny baskets to get to the bottom one. It turns a simple task into a chore. Stick to larger zones. You want to be able to reach in and grab what you need without dismantling a puzzle. Fewer moving parts are better.

    Material Flaws Are Real

    Plastic is cheap, but it cracks. Acrylic looks high-end, but it scratches if you breathe on it wrong. Bamboo is beautiful and “natural,” but it warps if you live in a humid climate or if your bathroom drawer gets wet. There is no perfect material. You have to be honest about where the drawer is located. I wouldn’t put bamboo in a kitchen sink cabinet. I wouldn’t put cheap thin plastic in a junk drawer where you throw heavy tools. Think about the abuse the organizer is going to take.

    Suction Cups vs. Spring-Loaded

    How do these things stay in place? Some rely on suction cups. Some rely on little rubber feet. Others use spring-loaded tension. In my experience, suction cups are a gimmick. They lose grip after three weeks, and then your dividers are sliding around the drawer like hockey pucks. Spring-loaded expandable dividers are usually more reliable because they wedge themselves tight against the walls. Gravity works, but gravity needs friction. If the base is slippery, the whole system fails.

    The “Perfect Fit” Illusion

    You want your organizer to fill every square inch of space. I understand the urge. But if you buy a grid that is exactly the size of the drawer, with zero wiggle room, good luck getting it back in if you accidentally dump it out. You need a tiny bit of tolerance—maybe a quarter of an inch. Otherwise, installing it becomes a stressful game of Tetris where you are afraid to scratch the wood. Leave a little breathing room. It makes life easier.

  • The ultimate list of modular storage tools that will save your sanity

    The ultimate list of modular storage tools that will save your sanity

    Why Fixed Shelving Is the Enemy of Sanity

    I have a genuine beef with built-in shelving. It looks great in the showroom, but six months later, your life changes, and suddenly that perfectly spaced cubby is useless. You buy a new pair of boots, and suddenly the shoe rack is a war zone. This is where modular storage tools come in. They aren’t just about being neat; they are about admitting that your stuff is going to change.
    Modular systems are essentially LEGOs for adults. You buy a frame, you buy some bins, and you arrange them. If you need more vertical space for tall vases in March, you move a shelf. If you need more horizontal space for sweaters in November, you move it back. It’s not rocket science, but it feels like a revelation when you stop trying to cram your life into a static grid. The best storage tools 2026 has to offer are all about this flexibility.

    The Mechanics of a Good Grid System

    Let’s talk about how these things actually work. Most modular systems rely on a few basic components: vertical tracks, horizontal brackets, and some sort of container or shelf. The magic happens in the spacing.
    I used to think wire racks were the pinnacle of organization. They aren’t. Small items fall through the wires, and the dust collects in ways that are genuinely upsetting. Solid surfaces are better. The real game-changer is the groove system—tracks that let you clip shelves in at any height interval. It sounds trivial, but that one-inch difference is the line between “this fits perfectly” and “I have to smash this down to close the door.”
    When you are looking at modular organizer recommendations, ignore the pretty marketing photos and look at the hardware. Does the bracket lock in place? Does it wobble when you touch it? If it feels flimsy in the store, it will collapse when you load it with books.

    Closet Organizer Products That Actually Work

    Closets are the usual victims of bad design. You get a single rod and a high shelf. That’s it. Modular closet organizer products fix this by doubling or tripling your hanging space.
    The most effective setup usually involves a “double hang” configuration. You hang a rod high up for long coats and dresses, and then drop a second rod below it for shirts and pants. It instantly doubles your capacity. But the real sanity-saver is the pull-out basket. I’m talking about those wire or fabric bins that slide out like drawers.
    Throwing socks into a pile on a shelf is depressing. Folding them into a slide-out bin makes you feel like you have your life together. It’s a small psychological win, but at 7:00 AM, you need those wins. Look for systems that allow you to swap out baskets for shelves later. You might want bins for socks now, but shelves for shoe boxes next year.

    Drawer Dividers Are Non-Negotiable

    If there is one modular tool I would fight for, it’s the adjustable drawer divider. Not the cute little plastic boxes that take up half the space. I mean the spring-loaded dividers that expand to fit the width of your drawer.
    Before I used these, my “junk drawer” was a black hole of batteries, cables, and takeout menus. Now, I compartmentalize everything. One section for charging cables, one for batteries, one for the random stuff I can’t categorize. It sounds rigid, but it’s actually freeing. You stop looking for things because you know exactly where the boundary is.
    The same applies to kitchen utensils. The “utensil crock” on the counter is fine, but it takes up counter space. A drawer with dividers keeps the spatulas and ladles hidden but accessible. It’s cleaner.

    Modular Storage Tools for the Kitchen

    The kitchen is where modular storage really earns its keep. Specifically, the pantry. The “shelf within a shelf” concept is brilliant here. You have a standard depth shelf, but your spice jars are only two inches wide. You are wasting six inches of depth behind them.
    A modular tiered rack or a pull-out platform lets you see the soy sauce hiding in the back. No more knocking over the olive oil to get to the hot sauce. It’s frustrating when you buy duplicates of things you already own just because you couldn’t see them.
    Refrigerators are another battleground. Modular bins for the fridge door—clear plastic trays that clip onto the shelves—can corral the chaos of condiments. It prevents the “avalanche” effect when you open the door too quickly. I don’t know why manufacturers don’t just build these in, but until they do, the aftermarket solutions are worth the twenty bucks.

    The Trap of Over-Organizing

    There is a dark side to this. I’ve seen it. You get sucked into the aesthetic of organizing, and you start buying cute bins before you even know what you are putting in them. You end up organizing your clutter rather than getting rid of it.
    Don’t buy a modular storage tool just because it looks good on Instagram. Buy it because you have a specific problem: “My shoes are piled on the floor,” or “I can’t find my tax documents.”
    If you aren’t careful, you’ll spend a fortune on acrylic boxes and still have a messy house. The goal isn’t to have the prettiest storage; the goal is to stop thinking about your stuff so you can get on with your day. If the bin is opaque and ugly but holds your winter gear perfectly, keep it. Function over feelings. That’s the only way modular storage actually saves your sanity.

  • Modular organizers versus custom closets finding the cheaper option

    Modular organizers versus custom closets finding the cheaper option

    Breaking Down the Basics

    Let’s cut through the marketing fluff. When you stand in a messy bedroom with a credit card in your hand, you aren’t looking for “storage solutions.” You are looking for a way to make the piles of clothes disappear without spending your kids’ inheritance. That’s where the battle happens: modular organizers versus custom closets.
    Modular organizers are the stuff you buy in boxes. They are wire racks, melamine shelves, and canvas bins that you mix and match like Lego. They are designed to fit the average closet, which is great if your closet is average.
    Custom closets are a different beast. A designer comes to your house, measures every weird angle, and builds a permanent shrine to your shoe collection out of solid wood or high-end laminate. It’s furniture that stays with the house.
    The distinction isn’t just about materials. It’s about how you buy it. One is a product you haul home in a minivan; the other is a service that involves consultations and installation crews.

    How the Pricing Actually Works

    I need to be blunt about the cost because showrooms are notoriously bad at giving straight numbers.
    For modular systems, you are paying for parts. A typical starter kit from a big-box store might run you $100 to $300. If you go high-end with a configuration from a container store, you could easily hit $1,000. But here is the thing: the price is transparent. You see the tag, you do the math.
    Custom closets are priced by the linear foot. This is where it gets scary. A basic custom install usually starts around $150 per linear foot and can skyrocket to $600 or more if you want real wood and fancy drawers. For a standard reach-in closet, that means you are looking at a minimum of $1,500, often much more.
    You aren’t just paying for materials. You are paying for the design time, the guy who drives to your house to measure, the installation crew, and the profit margin of the company. It adds up fast. If your budget is under $1,000, custom is effectively off the table unless you have a tiny, tiny space.

    The “Weekend Warrior” Trap

    Everyone underestimates installation. This is the hidden cost that wrecks budgets.
    Modular organizers are almost always DIY. You get a drill, a level, and a paper template. It seems easy. Then you hit a stud, or worse, you miss the stud. You realize your closet walls aren’t square (they never are). Suddenly, that 2-hour project turns into an all-day fight with drywall anchors.
    I’ve seen wire racks pull right out of the wall because someone overloaded them with winter coats. It’s frustrating.
    Custom closets include installation. The crew shows up, they build the thing in a day, and they clean up the sawdust. They handle the uneven walls and the baseboards. You are paying for that headache to go away. If you hate DIY, or if you rent your home and can’t drill holes, modular systems that hang from a clothes rod are your only safe bet. But if you own the place and are handy, you save a ton by doing it yourself.

    When Custom Wins the Value War

    There are situations where custom is actually the cheaper option in the long run, even if the upfront cost hurts.
    Think about vertical space. Standard modular kits are usually 6 or 8 feet tall. If you have 10-foot ceilings, you are wasting two feet of potential storage. Custom builders will stack cabinets all the way to the ceiling, giving you space for seasonal items that you only touch twice a year.
    Then there is the “weird room” factor. Older homes have closets with angles, pipes, and sloped ceilings that make standard racks impossible to use. You can try to jam a modular unit in there, but you’ll end up with awkward gaps and wasted corners. A custom system is built around those obstructions.
    If you are planning to stay in your house for ten years, the cost per use of a custom closet makes sense. It adds real resale value, mostly because buyers lose their minds over organized storage.

    Finding the Middle Ground

    You don’t have to choose between a wire rack and a $5,000 renovation. There is a sweet spot that most people ignore.
    You can buy “semi-custom” modular systems. These are high-end melamine units that you design online, but they ship to you in flat boxes. They are vastly superior to the wire shelving found in apartments. They look like custom furniture—drawer pulls, finished ends, adjustable shelves—but you install them yourself.
    Or, you can hack it. Buy a modular unit and pay a local handyman $200 to install it properly. You get the custom look without the custom price tag.
    The cheapest option isn’t always the one with the lowest sticker price. If you buy a cheap modular system that breaks in a year and you have to replace it, you wasted money. But if you buy a custom closet that requires a loan to finance, you might have over-invested in drywalled storage.
    Measure your space. Be honest about your DIY skills. If the walls are straight and your budget is tight, buy the modular kit and use a good level. If the room is awkward and you never want to look at a tape measure again, call the pros.