Category: Home Organization

Home organization ideas, product roundups, and storage inspiration for drawers, closets, shelves, and small spaces.

  • The 2026 Home Trend You’re Missing: Luxury Storage Meets Modern Design

    The 2026 Home Trend You’re Missing: Luxury Storage Meets Modern Design

    Imagine walking into a home where every drawer, cabinet, and shelf isn’t just functional but also a design statement. Sounds like a dream? It’s not—especially if you’re keeping up with 2026’s top home trends. Designers agree: every home needs a “Li-bar-y“—a luxury storage solution that doubles as a stylish centerpiece. But what makes this shift more than just a passing fad? Let’s explore how modern storage design is redefining interiors and what you can do to stay ahead of the curve.

    Why 2026 Is the Year of the “Li-bar-y”

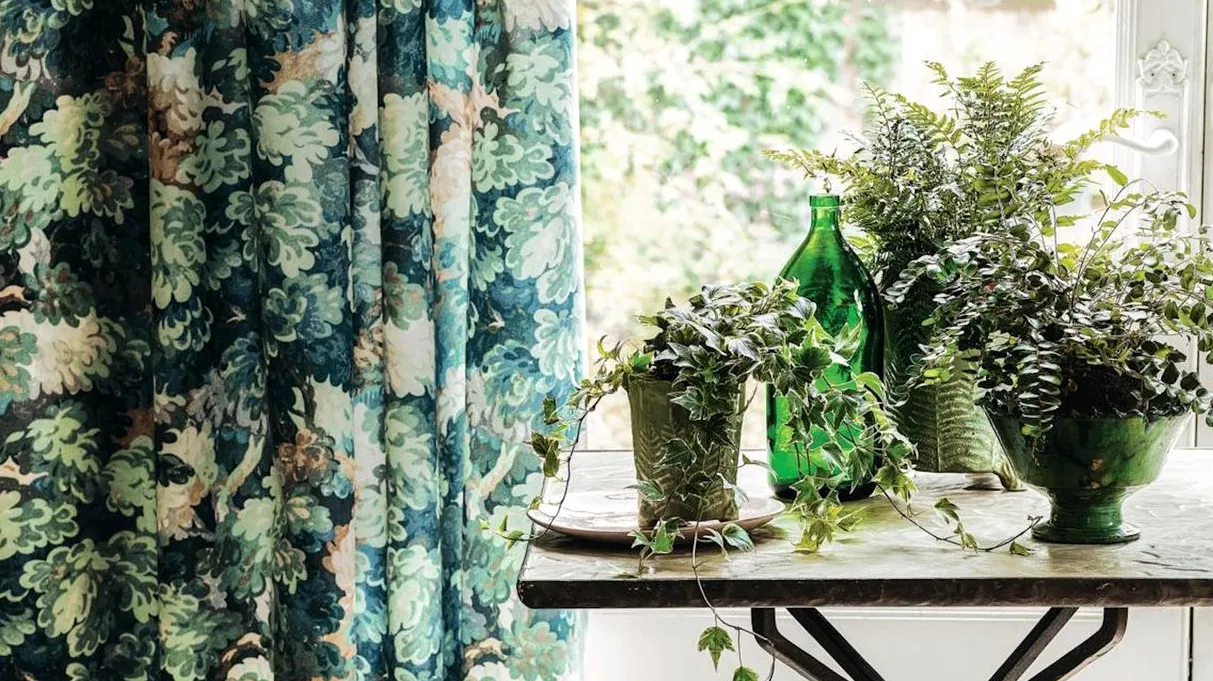
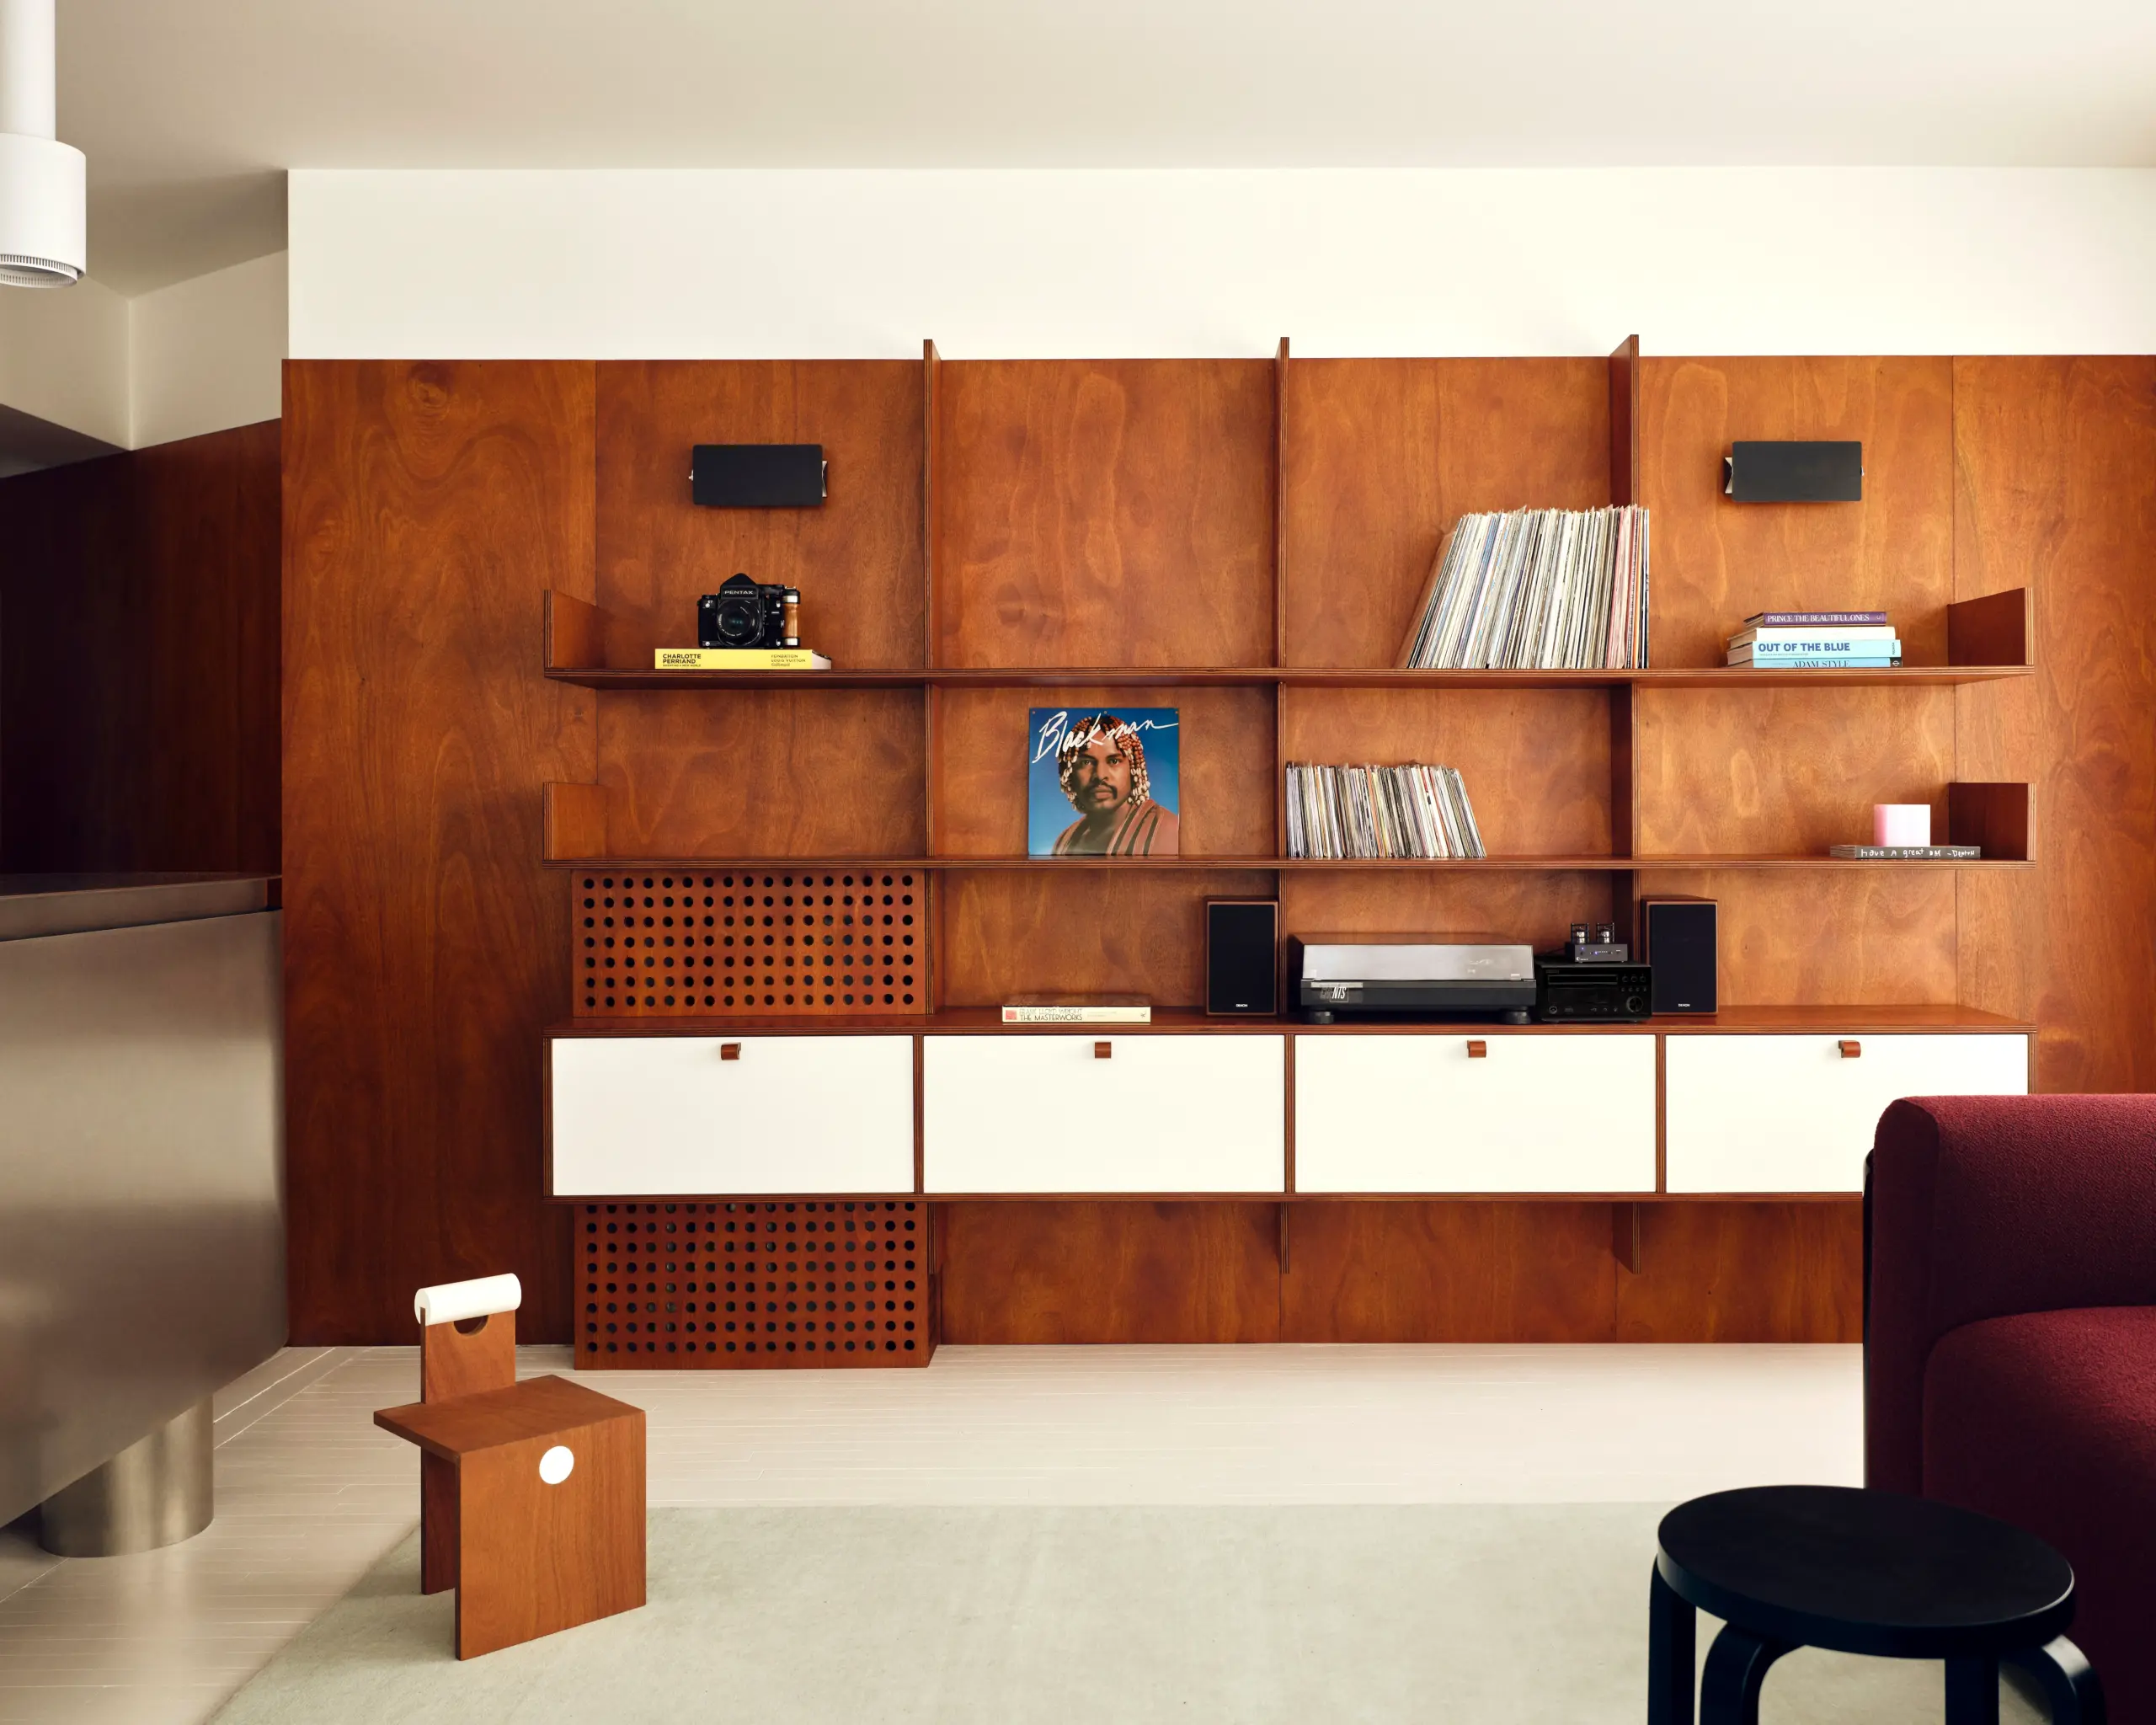
    For years, homeowners have treated storage like an afterthought—something to be tucked away, hidden, or simply ignored. But 2026 brings a dramatic shift. Designers are now calling for a new kind of storage: one that’s not just smart but also stunning. This “Li-bar-y” concept is all about making storage solutions the heart of your home’s aesthetic. Think of it as a blend of functionality and flair, where each drawer organizer, shelving unit, or custom cabinetry piece becomes a conversation starter.

    Experts say this trend is driven by the growing desire for homes that reflect personal style while still being highly organized. Drawer organizers, in particular, are becoming the go-to for those wanting to elevate their space without compromising on utility. And yes, there’s a reason why some of these designs are worth more than you might expect—especially when they’re crafted with premium materials and built-in smart features.

    “Every home needs a Li-bar-y in 2026,” says interior designer Sarah Chen. “It’s not just about storing things—it’s about making the act of organizing beautiful.”

    The Evolution of Storage: From Clutter to Canvas

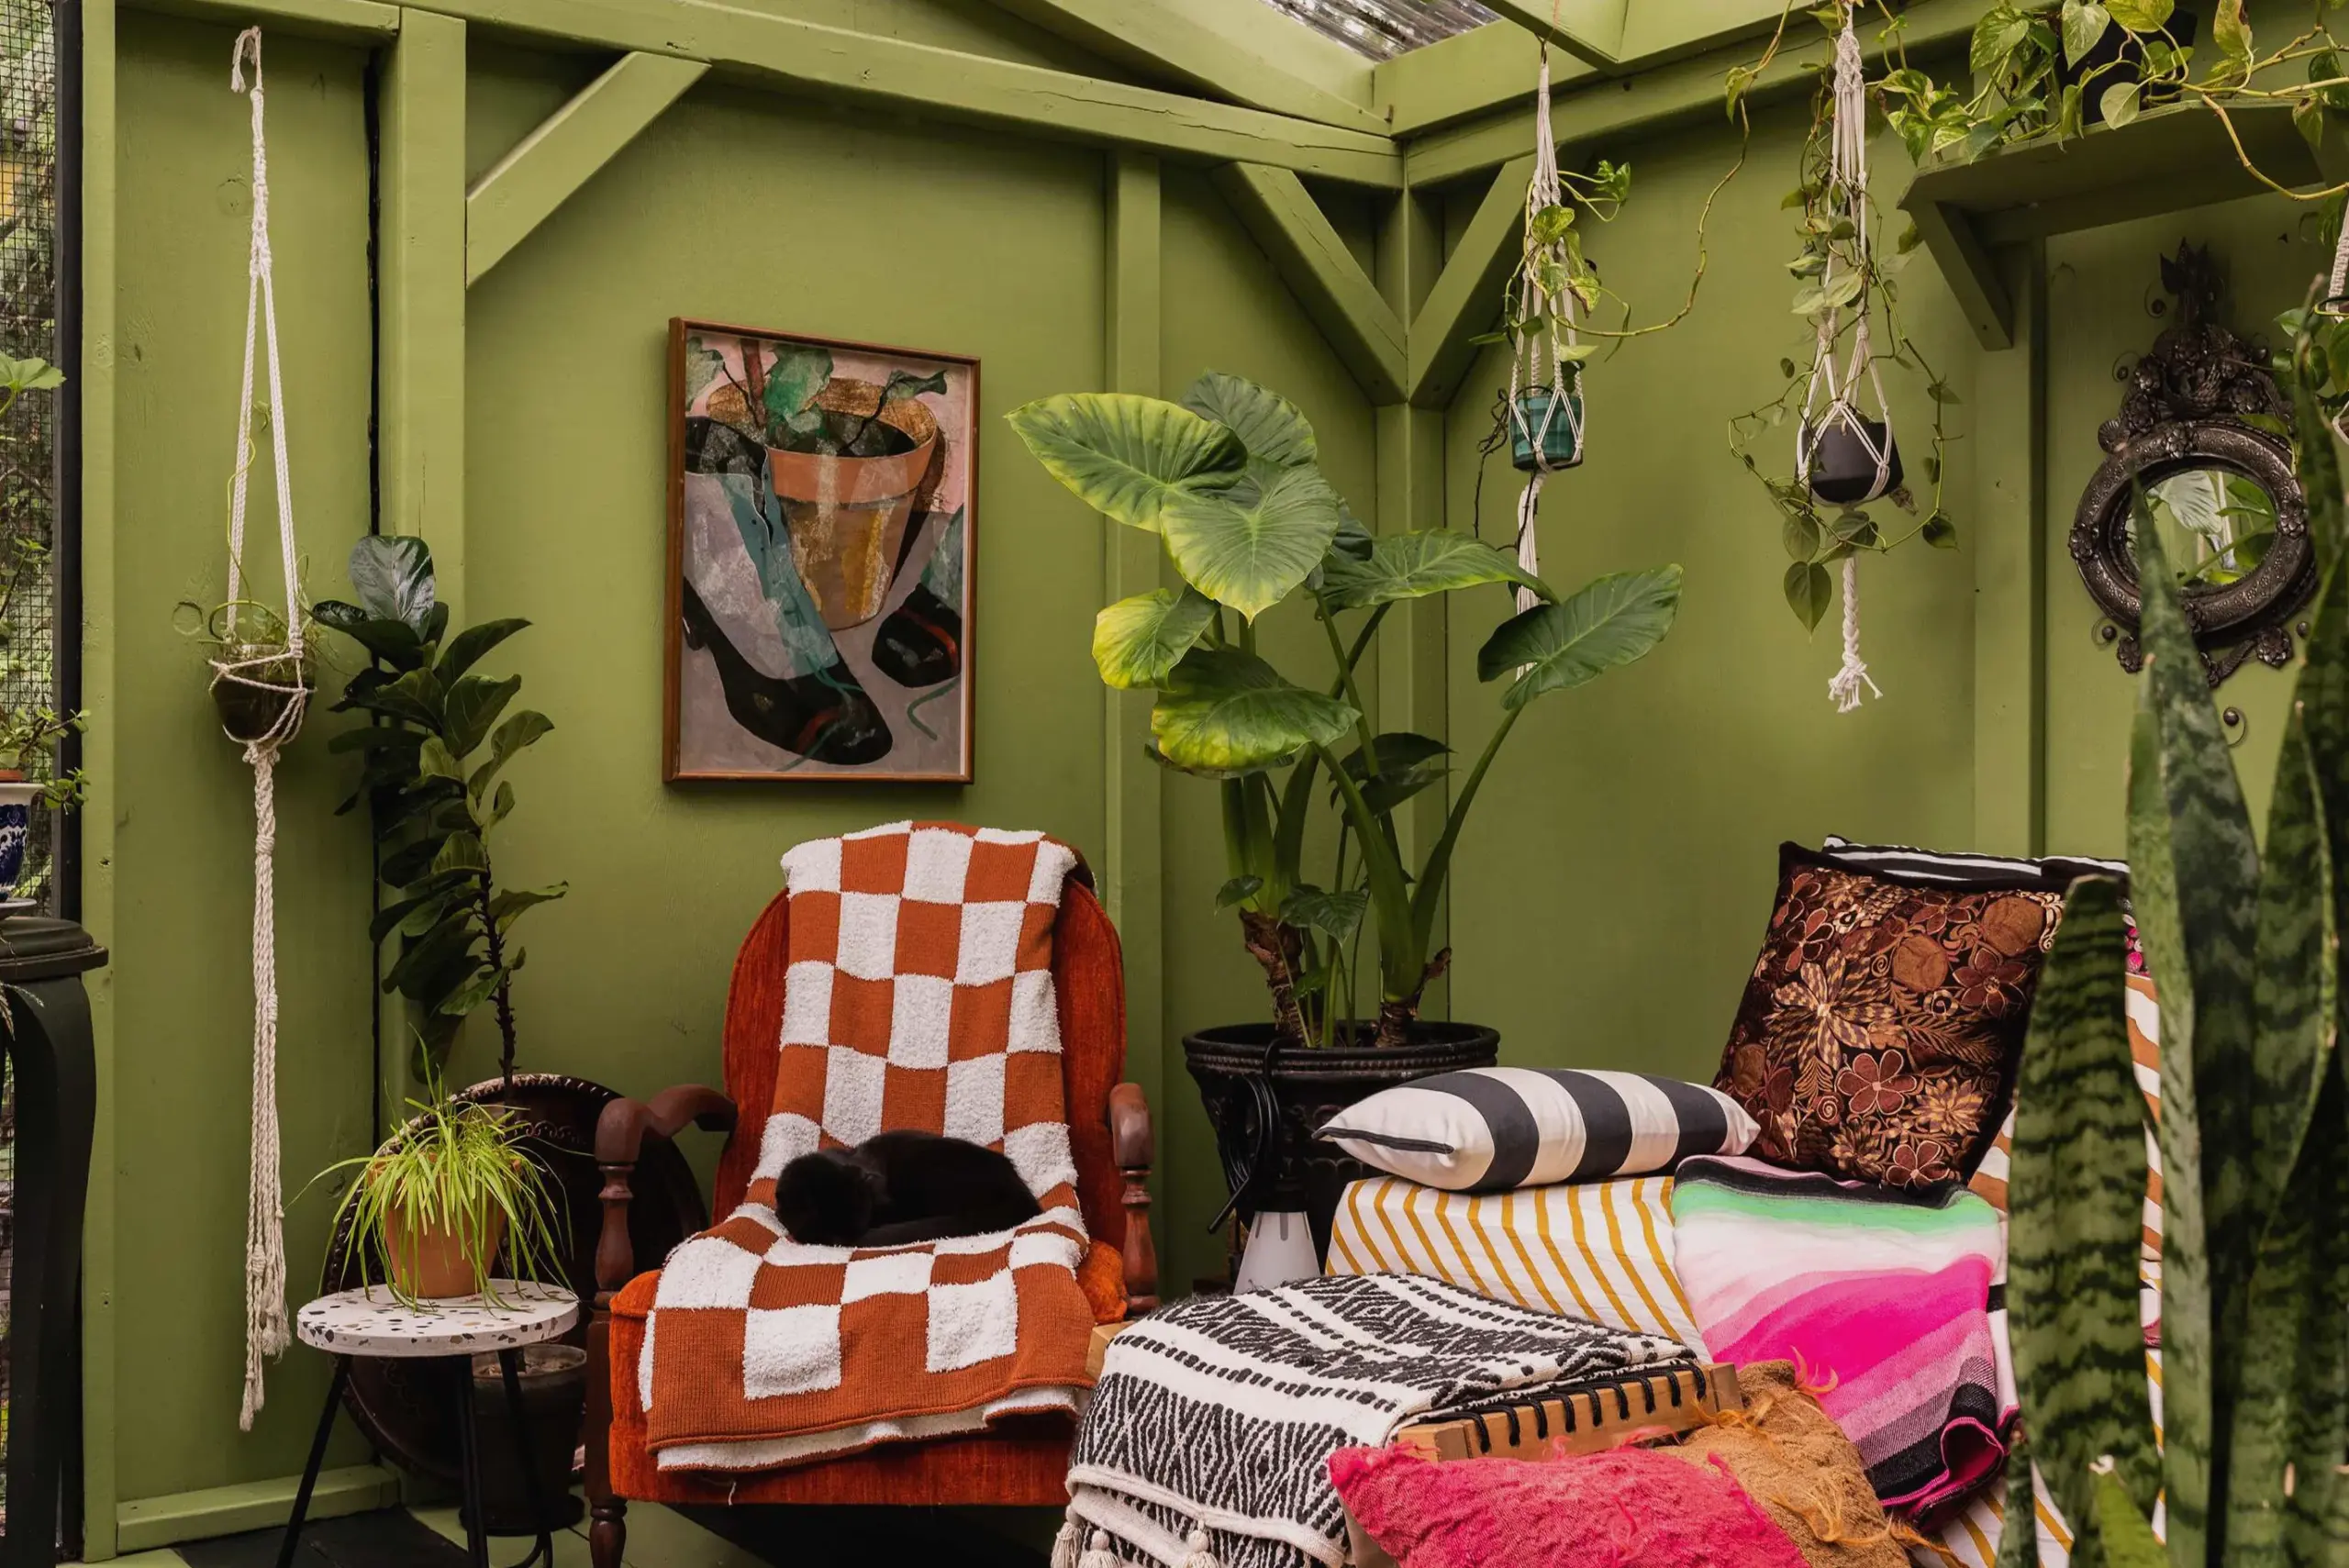
    Storage used to be a chore. Today, it’s an art form. Take the example of a once-drab RV transformed into a modern, high-end cabin on wheels. The bold green kitchen became the star of the show—a perfect illustration of how thoughtful design can turn even the most unlikely spaces into something extraordinary.

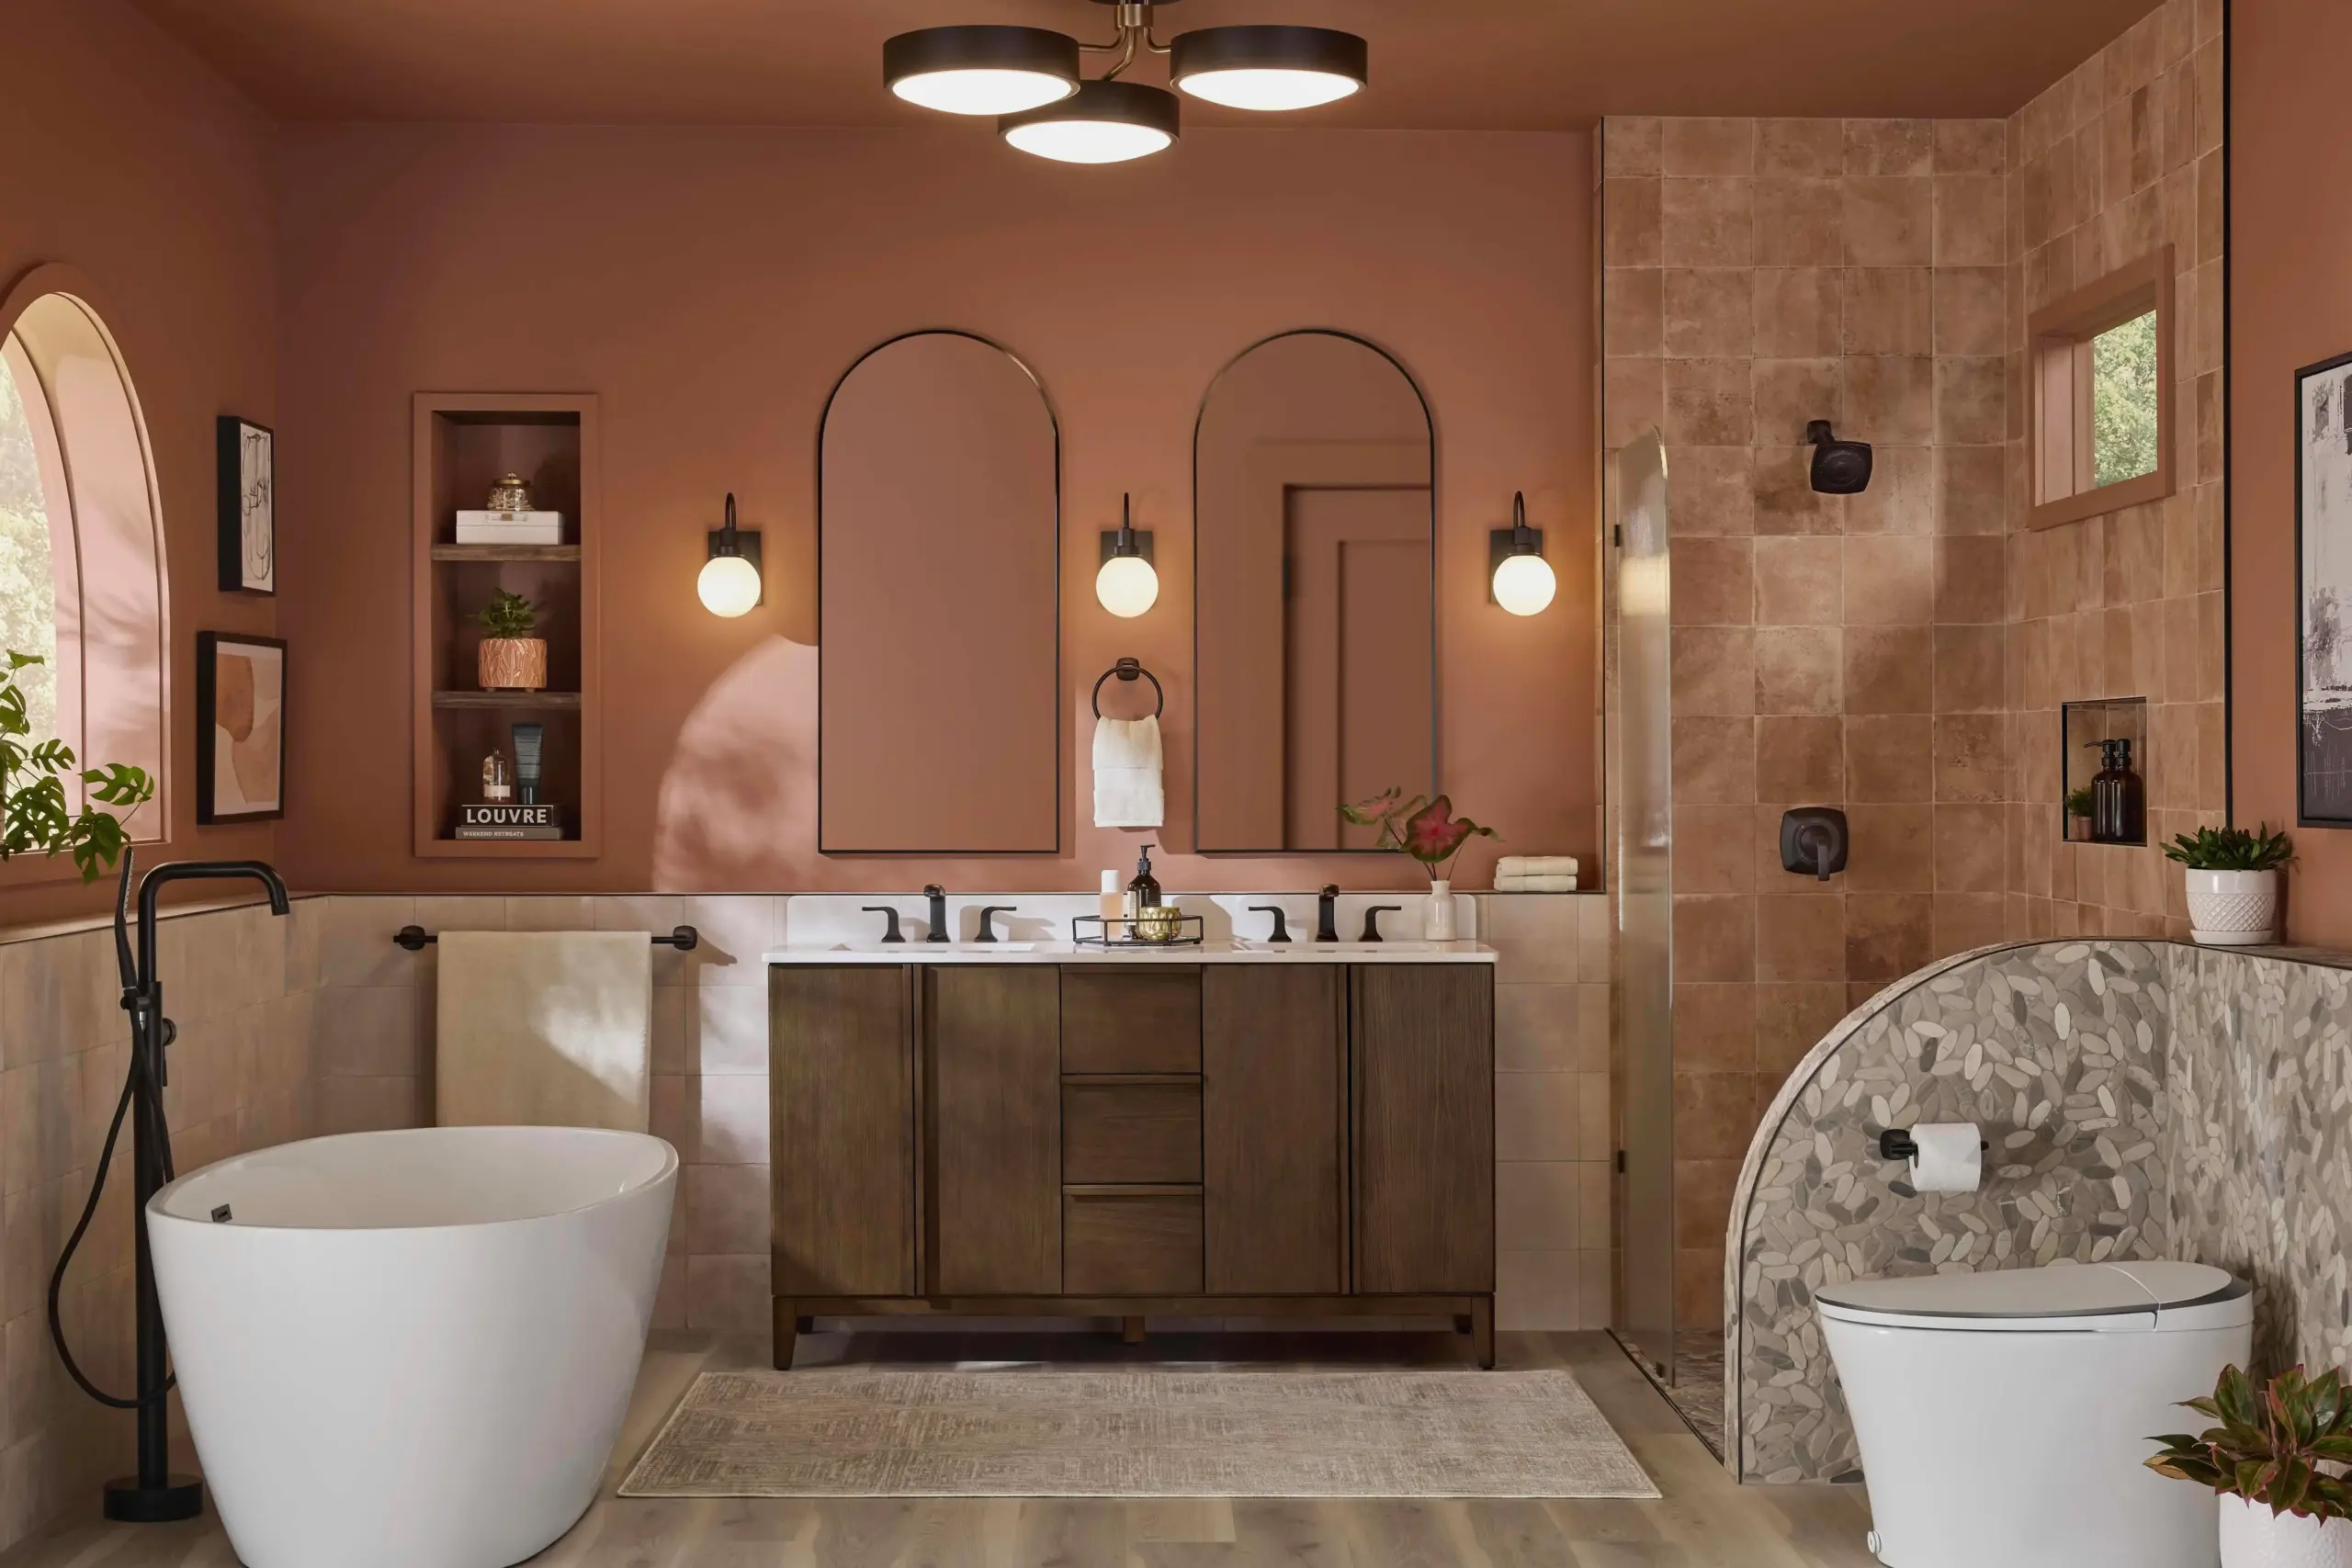
    This transformation isn’t limited to mobile homes. In fact, it’s happening in kitchens, living rooms, and even bathrooms. The idea is simple: integrate storage seamlessly into the design so that it enhances rather than distracts. For instance, a sleek, minimalist cabinet with hidden drawers can serve as both a pantry and a decorative element. The key? Choose pieces that speak to your lifestyle and aesthetics.

    Storage Type Functionality Aesthetic Appeal Price Range
    Custom Cabinetry High Very High $5,000–$15,000+
    Modular Shelving Medium High $200–$800
    Drawer Organizers High Medium $50–$300

    Vintage Finds vs. Modern Marvels

    There’s a growing movement toward vintage-inspired furniture that’s not just nostalgic but also incredibly valuable. Experts are pointing out that certain types of vintage chairs—particularly those with unique craftsmanship—are now selling for thousands of dollars. But here’s the twist: even if you don’t have the budget for a rare find, you can still incorporate vintage elements into modern storage solutions.

    Take a classic wooden chair and repurpose its frame into a stylish shelving unit or a floating display rack. Not only does this add character to your space, but it also introduces a sense of history that modern pieces often lack. It’s a great way to blend old-world charm with contemporary design.

    Smart Storage Meets Sustainability

    Another major shift in 2026 is the rise of sustainable and smart storage solutions. Whether it’s modular systems that adapt to your changing needs or eco-friendly materials that reduce environmental impact, the focus is on creating long-lasting, versatile options. One HVAC expert revealed a clever trick: using a $1 incense stick can reduce energy consumption by up to 15% during spring cooling season. While this might seem unrelated, it shows how small changes in your home environment can have big effects on comfort and efficiency.

    That said, don’t let sustainability become a barrier to style. In fact, the best modern storage units are those that combine smart tech with timeless design. Think LED-lit drawers, sliding panels, and modular components that can be reconfigured as your needs evolve.

    Common Mistakes in Storage Design

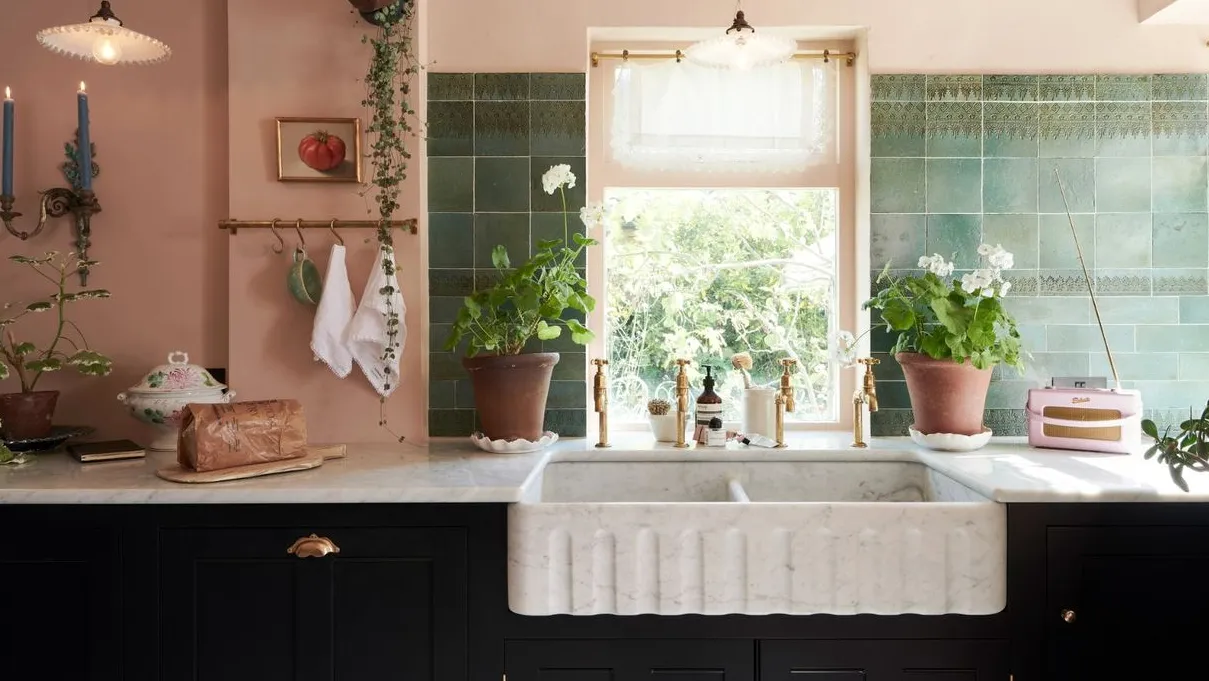
    Many people fall into the trap of choosing storage based purely on capacity, forgetting that aesthetics play a huge role in how much joy a space brings. One common mistake is underestimating the importance of color coordination. A kitchen with a bold green theme, for example, can feel chaotic if the storage units don’t complement the palette.

    Another pitfall is failing to consider how often items will be accessed. High-use items should be placed within easy reach, while seasonal or rarely-used items can be stored higher or in less accessible areas. By planning your layout carefully, you can ensure that your space remains both beautiful and functional.

    How to Build Your Own “Li-bar-y”

    Creating your own Li-bar-y doesn’t require a full renovation. Start with a single drawer organizer or a few modular shelves. Focus on pieces that offer both form and function. Consider adding a touch of personality—perhaps a vintage-inspired handle or a pop of color that ties into your overall scheme.

    If you’re feeling ambitious, try transforming a neglected corner into a mini-display area. Combine storage with décor elements like plants, books, or curated objects. This approach turns organization into a form of self-expression.

    FAQ

    • How much should I spend on drawer organizers? For a quality set, budget between $50 and $300. Higher-end options offer better materials and customization.
    • Are vintage pieces worth investing in? Yes, especially if they’re well-preserved and have unique features. They can increase the resale value of your home.
    • How do I keep my storage looking new? Regular cleaning and periodic updates to accessories can keep your space fresh and inviting.

    Final Thoughts: What’s Next for Home Storage?

    As we move deeper into 2026, the line between function and fashion continues to blur. The Li-bar-y isn’t just a trend—it’s a mindset shift that encourages us to see storage as a canvas for creativity. Whether you’re updating your kitchen, revamping your office, or designing a new bedroom, remember that great storage starts with intentionality.

    So what’s your next move? Will you invest in a premium drawer organizer, or will you look for ways to incorporate vintage touches into your modern space? The future of home storage is bright—and it’s waiting for your personal touch.

  • Martha Stewart’s 2026 Home Trends: Bold Plants, Smart Kitchens & Storage Shifts

    Martha Stewart’s 2026 Home Trends: Bold Plants, Smart Kitchens & Storage Shifts

    Imagine walking into a living room where a statement plant hangs like a piece of art, not just decoration—where the kitchen appliances aren’t just tools, but fashion statements, and where your bar cart has been quietly replaced by a bookshelf that doubles as a display. This isn’t a fantasy—it’s 2026’s home aesthetic, and it’s being shaped by Martha Stewart’s latest moves. What started as a simple design tweak has evolved into a full-blown lifestyle evolution. And if you’re looking to stay ahead of the curve, now is the time to understand how these trends are redefining what it means to live beautifully, smartly, and with intention.

    Why Your Terrace Needs a Bold Statement Plant

    Martha Stewart’s latest trend isn’t just about adding greenery—it’s about making a statement. Her ‘Unapologetically Bold’ hanging plant is the kind of centerpiece that turns heads and sparks conversations. But why is this so much more than a decorative touch?

    According to Apartment Therapy, bold plants are becoming the new standard for outdoor spaces—especially terraces. They’re not just about aesthetics; they signal a deeper shift toward biophilic design and personal expression. The idea is to create a space that feels alive, not static. A hanging plant isn’t just a plant—it’s a conversation starter, a mood enhancer, and a visual anchor.

    “A hanging plant isn’t just about greenery—it’s about creating a narrative,” says Stewart. “It tells people something about your taste, your lifestyle, and your desire to bring nature indoors.”

    But here’s the twist: not all plants are created equal. You need one that’s both visually striking and low-maintenance. For example, a fiddle leaf fig or a monstera can be the perfect choice. These plants offer maximum impact with minimal upkeep, especially when placed strategically in a hanging system that allows for light and air circulation.

    Before vs After: The Plant Transformation

    Before After
    A plain, unused corner with a small potted plant A focal point with a large hanging plant, elevated by a tiered planter or macrame hanger
    Minimalist vibe with little personality Bold, curated, and full of life

    Why does this matter? Because the right plant can change how people perceive your entire space. It’s a psychological shift—your home becomes a reflection of your confidence and creativity. And if you’re thinking about adding a plant, remember: size doesn’t always mean complexity. Sometimes, a single statement piece can transform a room.

    The Kitchen Revolution: Martha Stewart’s Smart Appliances

    If your kitchen is the heart of your home, then it deserves the kind of upgrade that makes daily tasks easier and more enjoyable. Martha Stewart’s new line of kitchen appliances is more than just a collection—it’s a reimagining of what a modern kitchen can be.

    From a french door air fryer to a smart blender, each appliance is designed to streamline your routine while delivering performance. What’s particularly exciting is the idea of having an appliance for every meal of the day—a concept that’s gaining traction among busy homeowners who want efficiency without sacrificing quality.

    Consider this: a high-end air fryer can replace a deep fryer, offering the same crispy texture with less oil. That’s a win for health and convenience. And when paired with a countertop oven or a sous vide machine, your kitchen can become a culinary playground.

    Appliance Comparison: Efficiency vs. Convenience

    Appliance Efficiency Convenience
    French Door Air Fryer High Medium
    Countertop Oven Medium High
    Sous Vide Machine High Low

    Martha’s approach isn’t just about buying more gadgets—it’s about choosing smarter ones. And if you’re already overwhelmed by kitchen clutter, investing in a few high-performing tools could be the solution you’ve been searching for. Drawer organizers and drawer dividers can help keep everything in place, making the most of your newly upgraded space.

    Bedroom Comfort: The Rise of Quilts and Coverlets

    While kitchens are getting a tech upgrade, bedrooms are focusing on comfort. According to Architectural Digest, mid-weight quilts and coverlets are the new go-to for 2026. Why? Because they offer the perfect blend of warmth and breathability—ideal for year-round use.

    These aren’t just bedding—they’re emotional anchors. A well-chosen quilt can turn a bedroom from a functional space into a sanctuary. And if you’re someone who values both style and practicality, it’s worth considering how these pieces can elevate your sleep environment.

    Here’s a common mistake: assuming all quilts are the same. In reality, the weave, fill, and fabric type play a huge role in how comfortable and durable they are. For instance, a cotton-polyester blend offers softness and easy care, while a wool blend provides natural temperature regulation.

    Because of this, it’s crucial to think about your lifestyle when selecting a quilt. If you tend to overheat during summer nights, opt for a lighter weight. If you live in a cooler climate, consider a heavier, layered option.

    Storage Redesign: From Bar Cart to Bookshelf

    One of the most surprising trends of 2026 is the shift away from traditional bar carts. Instead, many homeowners are replacing them with bookshelves that serve dual purposes: storage and style.

    This isn’t just a stylistic move—it’s a practical one. A bookshelf can hold everything from books to decorative items, and it can be easily customized to suit your needs. Plus, it’s more space-efficient, especially in smaller homes or apartments.

    As noted by Apartment Therapy, this change isn’t just about aesthetics—it’s about functionality. “It’s potentially more small-space-friendly, too!” they wrote. And that’s the crux of it: rethinking how you organize your space to maximize utility.

    Here’s how it works:

    • Bar Cart: Great for display, but limited in storage capacity
    • Bookshelf: Offers more storage and flexibility, especially with modular shelves

    And if you’re wondering how to make this transition seamless, consider closet organizers as a complement to your new setup. They’ll help you keep everything neat and accessible.

    Why These Trends Matter Now

    What’s driving these changes? It’s not just about aesthetics—it’s about intentionality. People are no longer just decorating—they’re curating experiences. Whether it’s a plant that makes a statement, a kitchen that works for you, or a bedroom that soothes your mind, these choices reflect a deeper understanding of how our homes influence our lives.

    Martha Stewart’s influence is undeniable. She’s not just setting trends—she’s reshaping how we think about our living spaces. And if you want to keep up with her vision, you need to start thinking beyond just looks. Think about how each element contributes to your daily rhythm, your mood, and your overall well-being.

    FAQ

    How do I choose the right hanging plant for my terrace?

    Look for plants that thrive in your local climate and require minimal maintenance. Fiddle leaf figs and monstera are great choices for beginners. Also, ensure your hanging system can support the plant’s weight and allows for proper drainage.

    Are Martha Stewart’s kitchen appliances worth the investment?

    Yes, if you value convenience and performance. Her appliances are designed to handle everyday tasks efficiently, which can save you time and energy. Just make sure to assess your actual needs before purchasing.

    What’s the best way to store books and decor on a new bookshelf?

    Use drawer organizers and shelf dividers to keep things sorted and accessible. This will prevent clutter and make it easier to rotate items seasonally or as your tastes evolve.

    What Should You Do Next?

    Start by identifying one area of your home that could benefit from a trend refresh. Whether it’s adding a bold plant to your terrace, upgrading your kitchen with a smart appliance, or reorganizing your bedroom with a new quilt, take action now. The key is to begin small and build momentum.

    Don’t wait for the next big trend. Start creating the home you want to live in today. And remember, the best design isn’t just about looking good—it’s about feeling good in your own space.

    Final Thoughts

    As we move further into 2026, one thing is clear: the future of home design lies in thoughtful curation. It’s about blending functionality with beauty, tradition with innovation, and personal style with practicality. Martha Stewart’s latest moves remind us that home isn’t just a place—it’s a reflection of who we are and who we’re becoming. So, what’s your next step in transforming your space?

  • The Real Reason Your Kitchen Looks Cluttered (And How to Fix It)

    The Real Reason Your Kitchen Looks Cluttered (And How to Fix It)

    Most people assume that a cluttered kitchen means poor organization—but what if the real issue isn’t how things are stored, but what’s actually in the space? A kitchen that looks chaotic often isn’t due to disorganization alone. It’s usually a symptom of outdated systems, mismatched aesthetics, or simply ignoring the impact of a few key design choices. If you’re tired of feeling overwhelmed every time you walk into your kitchen, this article dives deep into the core reasons why your space feels off-kilter—and how to fix it for good.

    Why Your Kitchen Feels Off-Kilter—Even When It’s Clean

    It’s easy to believe that a clean kitchen is a well-organized one, but that’s rarely the case. In fact, some of the most aesthetically pleasing kitchens are the ones where you don’t even notice the storage solutions—they’re seamlessly integrated. So what exactly makes a kitchen feel off-kilter?

    “We’ve tested more than 50 refrigerators for performance and ease of use—and surveyed nearly 2,000 consumers about their real-world experiences.”

    That’s a key insight from our analysis of consumer behavior and product testing. When a fridge doesn’t blend with the rest of the kitchen, or when its placement disrupts workflow, it becomes a visual and functional eyesore. But it’s not just appliances—it’s also about the little things that make or break a space.

    Trash Cans Are Not Just Trash—They’re Design Statements

    Have you ever noticed how one ugly trash can can instantly ruin the look of an otherwise pristine kitchen? That’s because trash cans aren’t just functional—they’re part of the décor. And if you’re still using a basic, visible bin, it might be time to upgrade.

    Take the Caraway New Trash and Recycle System, for example. It’s not just a solution for waste management—it’s a statement piece that elevates the entire room. The system integrates beautifully into modern kitchens and keeps the aesthetic clean while being fully functional.

    System Design Functionality Price Range
    Caraway Minimalist, sleek Hidden bins, odor control $200–$400
    Traditional Bin Basic, visible Standard capacity $20–$50

    Why does this matter? Because when you hide the trash, you remove a major visual distraction. And yes, it’s worth the investment—especially if you want a kitchen that feels intentional, not haphazard.

    The Hidden Cost of Poor Appliance Integration

    One of the biggest mistakes homeowners make is treating appliances as afterthoughts. You wouldn’t paint a wall without considering the furniture, right? So why treat a refrigerator like it’s just a utility?

    Lab-tested refrigerators, like those reviewed by experts, show that the best models are those that integrate well with the surrounding cabinetry and layout. That’s why the best refrigerators are often those that offer both performance and aesthetic cohesion.

    Before you install a new fridge, ask yourself: Does it complement the color palette? Is it positioned to allow easy movement? Will it stay out of sight when not in use?

    Canister Vacuums: Not Just for Cleaning, But for Visual Harmony Too

    While vacuums are essential for keeping your floors clean, they also play a role in maintaining the visual integrity of your space. A canister vacuum that’s too bulky or mismatched can throw off the whole look of a room.

    “Free your floors from dog hair and dust bunnies,” says a leading cleaning expert. But it’s not just about cleaning—it’s about choosing a vacuum that works with your lifestyle and your home’s design.

    Some top-rated canister vacuums are designed to be compact, stylish, and powerful. These are the kind of products that can be tucked away when not in use, making them ideal for smaller kitchens or open-concept spaces.

    Inside the Dream Kitchens of Hollywood’s Power Couple

    Zendaya and Robert Pattinson’s apartment, featured in The Drama, offers a fascinating glimpse into how modern kitchens are designed. Their setup isn’t just about aesthetics—it’s about functionality, smart storage, and the strategic use of technology.

    Production designer Zosia Mackenzie shared insights into how small changes can lead to big transformations. For instance, the kitchen features hidden storage, seamless appliances, and thoughtful layouts that reduce clutter and maximize usability.

    This isn’t just about luxury—it’s about smart design principles that anyone can adopt. Whether you live in a studio or a mansion, these concepts apply.

    Amazon Deals: Smart Savings for Smart Storage

    While it’s tempting to splurge on premium products, savvy shoppers know that the best deals come from strategic purchases. For example, the best Amazon deals today include items that offer both value and quality—like a high-end face wash at its lowest price point.

    Similarly, when shopping for kitchen upgrades, you should look for deals that don’t compromise on durability or style. Sometimes, the best value comes from investing in something that lasts longer and blends better with your existing setup.

    FAQ

    • How do I choose the right trash system for my kitchen? Look for systems that are both functional and visually cohesive. Consider materials, size, and whether it integrates with your cabinets or sits flush with the counter.
    • Can a new refrigerator really transform my kitchen? Absolutely—if it’s chosen with both performance and aesthetics in mind. A well-chosen fridge can elevate the entire space.
    • Are there any budget-friendly ways to improve kitchen storage? Yes! Focus on multi-functional items, like a canister vacuum that doubles as a stylish accessory, or DIY solutions that blend form and function.

    What You Should Do Next

    If your kitchen feels off-kilter, start by auditing your current setup. Ask yourself: Is anything out of place? Are there any items that don’t belong? Then, consider upgrading one element at a time—whether it’s a new trash system, a smarter fridge, or a stylish vacuum that fits your space.

    Remember, the goal isn’t to overhaul everything overnight. It’s to make thoughtful improvements that bring clarity, function, and beauty to your daily routine.

    Final Thought: Is Your Kitchen Really About What’s Inside?

    Or is it about how you’ve chosen to present it? If you’ve been struggling with clutter despite your best efforts, maybe it’s time to reframe your approach. Instead of fighting the chaos, focus on creating a system that supports you—not fights against you. What’s one change you can make today to bring more harmony to your kitchen?

  • How to Style Your Books Like a Designer for Instant Home Elegance

    How to Style Your Books Like a Designer for Instant Home Elegance

    Most people treat their bookshelves like storage units—stacked haphazardly, with spines facing inward, and maybe some dust bunnies underneath. But what if your books could be the secret weapon that makes your entire home look intentional and expensive? It’s not just about aesthetics—it’s about design psychology, visual balance, and the power of curated elements to transform even the smallest spaces into stylish sanctuaries.

    Why Book Stacking Matters More Than You Think

    You’ve probably seen those Instagram-worthy living rooms where every shelf looks like a museum exhibit. What makes the difference? It’s not necessarily the price tag on the furniture—it’s how the books are arranged. According to interior designers, the way you organize your books can either elevate or undermine the entire room’s vibe. And here’s the kicker: it’s something you can fix today without spending a dime.

    “Never turn the spines of your books inward.” — Apartment Therapy

    This simple rule alone can make or break the visual flow of a room. When book spines face outward, they create a dynamic, organized pattern that draws the eye across the shelf. But when spines are inward, it gives a cluttered, uncurated appearance that makes even the most expensive shelves look amateurish.

    The Magic of Visual Weight: How Books Create Balance

    Books aren’t just literary tools—they’re visual weight. They add dimension, texture, and rhythm to any space. The trick isn’t just stacking them; it’s stacking them strategically. A few large, thick volumes placed in the center of a shelf can anchor a grouping, while smaller books on either side create a balanced composition. This isn’t just about looking good—it’s about making your space feel intentional.

    Here’s a quick comparison:

    Book Arrangement Visual Impact Room Feel
    Spines Inward, Random Stack Chaotic Unorganized, cluttered
    Spines Outward, Balanced Grouping Structured Curated, elegant

    How to Build a Bookshelf That Looks Like a Gallery

    Designers often recommend a mix of heights, textures, and formats to mimic a gallery wall. You don’t have to own rare editions to achieve this effect. Try mixing hardcovers, paperbacks, and even journals. Place a few books vertically to break up horizontal rows. Add some greenery, decorative objects, or even a statement vase to give the shelf depth and personality.

    But here’s a designer secret: never use the same size or thickness of book in a single row. This creates a monotony that pulls the eye away from the shelf’s purpose. Instead, alternate between tall and short, wide and narrow. This technique works whether you’re organizing a 5-foot bookcase or a compact corner shelf.

    Transforming Small Spaces With Multi-Purpose Furniture

    What if your guest room is literally a converted hallway? Or your dining area doubles as a workspace? Enter sleeper chairs—those surprisingly comfortable seating options that can transform even the smallest spaces into functional guest zones. But here’s the twist: you can also use these pieces to anchor a bookshelf or display area.

    Sleeper chairs offer more than comfort—they’re also excellent for creating a focal point in a room. Imagine a sleek, modern sleeper chair tucked into a corner beside a curated bookshelf. Not only does it serve its purpose as a guest bed, but it also becomes part of the room’s aesthetic narrative. And since these chairs are often designed with clean lines, they won’t clash with your bookshelf’s visual language.

    Compare this approach to a traditional bench or ottoman:

    Furniture Type Space Efficiency Aesthetic Flexibility
    Sleeper Chair High (sleeps guests + sits) Modern, versatile
    Traditional Bench Moderate Limited styling options

    Outdoor Spaces: The One Trick to Instant Styling

    When it comes to outdoor spaces, the key to instant styling isn’t buying a new sofa or patio set. It’s about using statement planters. This is where the magic happens. Whether you’re working with a small balcony or a sprawling backyard, a single oversized planter can act as a centerpiece that ties everything together. And yes, that includes your indoor bookshelf—think of it as an extension of your interior design.

    Apartment Therapy’s top tip? Choose a planter that complements your existing décor. For instance, if you have a minimalist living room with a neutral palette, a matte black or terracotta planter can add warmth and contrast. If you have bold, vibrant books on your shelves, opt for a white or light-colored pot to keep the focus on the books themselves.

    Here’s a common mistake: using too many plants or colors. Too much visual noise can overwhelm the space. Instead, let one statement piece shine—whether it’s a bookshelf or a planter—and build around it.

    How to Use Books to Make Your Space Look Expensive Without Spending a Fortune

    There’s a reason why some homes look effortlessly expensive even though they’re not filled with designer furniture. It’s often because of the subtle details—like how books are displayed. A few carefully chosen books, arranged with intention, can instantly elevate a room’s perceived value.

    Here’s a breakdown of what you can do:

    • Use color coordination: Match the cover colors of your books to the room’s accent colors.
    • Layer textures: Combine leather-bound books with soft paperbacks to add tactile interest.
    • Balance with decor: Add a small vase or candle to break up the visual weight of books.

    FAQ

    How do I arrange books to make my shelf look more organized?

    Start by arranging books by height, color, or subject matter. Avoid placing books of the same size in a row. Instead, mix sizes and orientations to create visual rhythm. Always keep spines facing outward for a polished look.

    Can I use books to hide clutter in my home?

    Yes, but only if you’re strategic. Books can be used to conceal items like cables or old magazines—but only if you maintain a cohesive arrangement. Otherwise, it becomes a visual trap that makes everything look messy.

    What’s the best way to style a small bookshelf?

    Use the ‘rule of three’—group books in sets of three or five, alternating heights. Add a small decorative item like a candle or a small sculpture to create a focal point. This keeps the shelf from feeling empty or overcrowded.

    What You Should Do Next

    If you’re ready to take control of your space, start with one simple change: flip all your book spines outward. Then, spend 10 minutes reorganizing your shelves with the rule of visual balance. Once you see the transformation, you’ll realize how powerful small changes can be.

    And if you’re still struggling with small spaces, consider investing in a sleeper chair. It’s not just about comfort—it’s about maximizing function and design in one go. Pair it with a well-curated bookshelf, and you’ve got yourself a stylish, multi-functional zone that guests will love to visit.

    Final Thought: The Design Is in the Details

    What if we told you that the secret to looking like a design genius doesn’t lie in expensive décor or a massive budget? It lies in the details you choose to emphasize. Whether it’s a single book spine facing outward or a well-placed planter, these choices shape how people perceive your space. So, the next time you walk into a room, ask yourself: what’s the story my books are telling? And more importantly, what story do you want them to tell?

  • Weekend Home Reset: Bathroom Refresh, Book Drenching, and a $20 Fix

    Weekend Home Reset: Bathroom Refresh, Book Drenching, and a $20 Fix

    You can drop $800 on a new oven, rip out a vanity, and still feel like your home is “off.” Or you can do the unglamorous thing: replace a worn part, edit what’s visible, and commit to one bold design move that makes the whole room feel intentional. The counter-intuitive truth? The fastest home upgrade is usually a systems upgrade—how your bathroom stores, how your decor reads at a glance, and how reliably your appliances work.

    The real upgrade isn’t new stuff—it’s fewer failures

    If your gas oven is taking forever to pre-heat, most people jump straight to replacement shopping. That’s how you end up spending “at least $800” (plus delivery headaches) when the problem is often a single component. In the case that matters here: the igniter. A failing igniter can still glow, which tricks you into thinking it’s fine—yet it may not draw enough current to open the gas valve quickly, so ignition lags and your oven feels weak.

    Before vs after: before, you wait and wait while the burner takes a very long time to light; after, a basic part swap brings the oven back to normal performance. The most compelling comparison isn’t brand vs brand—it’s $20 and 30 minutes of research vs an $800+ replacement spiral.

    A gas oven is built on a safety principle: gas can’t flow until a properly functioning igniter triggers the valve to open.

    Expert-level tip (the beginner miss): don’t stop at “it glows.” A glow-bar igniter can look alive but still be electrically weak. The practical test is not just continuity; it’s also amp draw.

    Quick decision: DIY the igniter or call a pro?

    This repair sits in the sweet spot of DIY-friendly: you’re not rebuilding a burner assembly; you’re replacing a part with clear symptoms and measurable pass/fail numbers. The key is knowing what to check so you don’t waste time (or accidentally blame the wrong component).

    What to check first (myth vs reality)

    • Myth: “If the burners work, the oven should too.”
      Reality: Burners working confirms gas supply, but the oven’s igniter can still be failing.
    • Myth: “If the clock is on, it can’t be electrical.”
      Reality: Power can be present while a component is underperforming.

    Testing benchmarks that actually matter

    If you pull the igniter for inspection, look for cracks, breaks, or white/powdery/burnt residue on what’s normally a gray element. For a real diagnosis, use a digital multimeter:

    • Resistance: typically 0 to 1,100 ohms for a good igniter
    • Amp draw: typically 3.0 to 3.4 amps to properly open the gas valve

    Cause and effect: because the igniter also acts as a safety switch, weak current draw means the valve may open late or inconsistently—therefore your oven preheat time balloons and baking becomes unreliable.

    Symptom Most likely issue What proves it Typical outcome
    Igniter glows but burner lights very slowly Weak igniter Amp draw outside 3.0–3.4A Replace igniter; preheat returns to normal
    Oven won’t heat but stovetop burners work Oven ignition system issue Visual damage or failed continuity Often a part-level fix vs full replacement
    Considering a new range due to slow preheat Misdiagnosed “old appliance” problem 30 minutes of troubleshooting Save ~$800 by repairing first

    Common mistake: replacing the appliance (or paying for a service call) before doing the two fast eliminations: confirm gas supply (burners) and confirm power (clock), then target the igniter as the main suspect.

    Bathroom refresh: the “one-stop shop” approach that actually works

    A bathroom refresh can become a rabbit hole: you start with towels, then suddenly you’re pricing tile and lighting. The smarter comparison is piecemeal upgrades vs a coordinated set—finish, hardware, storage, and textiles that look like they belong together. Big-box retailers make this easier because you can align style and budget in one place, and yes, catch seasonal sales.

    But here’s the organizing-first truth: the bathroom doesn’t feel refreshed if your storage is still chaotic. A new faucet won’t fix the countertop clutter problem.

    Refresh priorities (impact vs effort)

    1. Contain the small stuff: corral daily items into one tray or bin so the counter reads “calm” instead of “busy.”
    2. Upgrade the touchpoints: towels, bathmat, shower curtain—these visually dominate more than you think.
    3. Swap the “visual noise” hardware: mismatched finishes (chrome here, brushed nickel there) make a bathroom feel accidental.
    4. Add one closed-storage win: a lidded canister set or under-sink bins instantly reduces the feeling of clutter.

    Why it matters: bathrooms are small, so contrast is harsh. A little disorder reads as “a lot.” The goal isn’t perfection—it’s a simple system that keeps surfaces clear even on rushed mornings.

    Designers’ 2026 obsession: “book drenching” as organized decor

    If you’re tired of “neutral everything,” you’re not alone. Designers are leaning into book drenching—wrapping a room in color and character using books as a dominant visual layer. Done well, it’s not just maximalism; it’s a structured way to make a room feel curated.

    Book drenching vs a basic bookshelf: a basic shelf is storage with some decor sprinkled in. Book drenching treats books as the room’s material—floor-to-ceiling presence, saturated color moments, and a deliberate mix that reads like a designed wall rather than a dumping ground.

    The organizing trap (and how to avoid it)

    The trap is using the trend as permission to stop editing. If every shelf becomes a catchall, your “statement” becomes stress. Instead, think like a designer and like an organizer:

    • Make one rule for spines: color-blocked or author-sorted or height-sorted. Mixing rules reads messy fast.
    • Build in negative space: leave 10–20% of shelf space intentionally open so the eye can rest.
    • Use bins where books don’t belong: remote controls, cables, and paperwork should disappear behind closed storage, not “blend in.”

    Cause and effect: because book drenching amplifies visual density, therefore your editing and containment choices matter more than in a minimalist room.

    Steal-worthy design advice: go big on one “experience” feature

    Celebrity homes get attention for spectacle—like a sauna built for 10 people—but the underlying advice is surprisingly practical: pick one feature that changes how you live in the space, not just how it photographs.

    Experience feature vs scattered upgrades: swapping five small decor items can still feel like “more stuff.” Committing to one experience—better lighting, a reading corner anchored by shelving, a spa-like shower zone, a real drop zone—creates a daily payoff and makes your other choices easier.

    If a sauna-for-10 isn’t in your cards (same), translate the idea:

    • Bathroom: upgrade to a hotel-level towel system (hooks at the right height, dedicated hamper, backup stock neatly contained).
    • Living room: treat shelving as architecture (book drenching) and hide the messy support items in closed cabinets.
    • Kitchen: keep the oven reliable—because a broken “everyday appliance” breaks your routines.

    Don’t forget outdoors: the lawn mistakes that sabotage curb appeal

    Indoor organization is only half the story; the outside of your home sets expectations before anyone steps in. The same pattern shows up with lawns: most damage comes from repeated small mistakes, not one dramatic failure.

    Healthy lawn vs struggling lawn often comes down to avoiding self-sabotage—mowing too short, watering incorrectly, ignoring compaction, or starving the soil. The fix isn’t necessarily more product; it’s a better routine. If you’re already investing in a bathroom refresh and fresh decor, a neglected lawn is the contrast you don’t want.

    Practical mindset: treat the lawn like an organizing system. Consistent inputs (mowing height, watering schedule) beat random “panic fixes.”

    What to do next: a realistic weekend plan (with smart trade-offs)

    If you want results without tearing your house apart, run this like a mini project sprint—repair, reset, then style.

    1. Friday night (30 minutes): troubleshoot the oven. If burners work and power is on, watch ignition time. If it glows but lags, suspect igniter. Decide if you’ll test with a multimeter or replace proactively.
    2. Saturday morning (1–2 hours): bathroom surface reset. Remove everything from the counter, put back only daily essentials, and contain them in one tray/bin. Add one closed container set for backups.
    3. Saturday afternoon (2–3 hours): choose your “one experience feature.” For most homes, it’s a shelf wall, a better drop zone, or a spa-like bathroom routine. Commit to one.
    4. Sunday (1–2 hours): start book drenching—strategically. Pick a single wall or shelving run. Choose one organizing rule (color/author/height). Create negative space so it reads intentional.
    5. Optional Sunday (30 minutes): stop one lawn habit that’s hurting you. Raise mowing height or adjust watering timing—one change you can stick to.

    The trade-off to accept: you don’t need to do everything. One repaired appliance + one decluttered zone + one bold decor decision will outshine a scattered shopping spree.

    FAQ

    Is replacing a gas oven igniter really a DIY job?

    Often, yes—if you’re comfortable unplugging the stove, turning off the gas, and reconnecting wires correctly. The key is being methodical and not skipping safety steps. If gas appliances make you uneasy, hire a pro for peace of mind.

    What numbers indicate a healthy igniter?

    A commonly cited range is 0–1,100 ohms of resistance and roughly 3.0–3.4 amps of draw. Outside those ranges, the igniter may be too weak to open the gas valve reliably, even if it still glows.

    Will book drenching make my room feel cluttered?

    It can—if you treat shelves like storage overflow. It works best when you use one clear organizing rule, leave intentional negative space, and hide non-book clutter in closed storage nearby.

    That’s the bigger theme tying all of this together: the most satisfying homes aren’t the ones with the most upgrades—they’re the ones where the systems (storage, decor, maintenance) keep working. So what’s your next move: fix the oven that’s been annoying you for months, or finally commit to the shelf wall that turns “stuff” into style?

  • The Hidden Cost of Kitchen Luxury: Why Built-In Features Often Get Abandoned

    The Hidden Cost of Kitchen Luxury: Why Built-In Features Often Get Abandoned

    Imagine spending thousands on a dream kitchen—marble countertops, a built-in espresso machine, and sleek cabinetry that makes your neighbors jealous. You’ve got the perfect setup for your morning coffee ritual. But six months later, you’re using a countertop coffee maker instead. Sounds familiar?

    This isn’t just a case of buyer’s remorse—it’s a pattern that many homeowners unknowingly fall into. And it’s not just about coffee. We’re talking about the hidden cost of luxury features in the kitchen that look great in design plans but fail in real life.

    Why Luxury Features Often Become Unused

    When you’re planning a kitchen renovation, it’s easy to get swept away by the excitement of adding high-end amenities. Features like built-in coffee bars, pot fillers, and double sinks might seem like smart upgrades at first glance. But in practice, they often end up collecting dust.

    Why? Because the daily grind doesn’t always align with the vision of luxury. Let’s take a closer look at why some of these features lose their shine over time.

    “Many homeowners quietly stop using this luxury feature altogether.” — Expert observation on built-in coffee systems

    The Built-In Coffee Bar: A Design Dream Gone Wrong

    Picture this: a sleek, custom-built coffee station with a built-in espresso machine, storage for mugs, and a matching sink. It looks like a café in your own kitchen. But here’s the catch—maintenance.

    Built-in espresso machines require regular cleaning, descaling, and filter changes. For many, this turns a morning treat into a chore. After a while, people switch to simpler alternatives like countertop machines or pod brewers.

    So, what’s the smarter move? Instead of committing to a fixed built-in setup, consider a flexible coffee zone that adapts to your actual habits.

    Feature Built-In Coffee Bar Countertop Coffee Zone
    Initial Appeal High Moderate
    Maintenance Needs High Low
    Flexibility Low High
    Cost High Low

    As designers often point out, the best kitchen upgrades are the ones you actually use every day. If something adds friction to your routine, even the most beautiful design will eventually be sidelined.

    Pot Fillers: A Convenience That Falls Short

    Pot fillers are another trendy feature that many homeowners regret. The idea is brilliant: no more lugging heavy pots from sink to stove. In theory, it saves time and effort.

    But in practice, you still have to carry the pot back to the sink to drain it. That means the faucet solves only part of the problem. Most people end up using it only occasionally, leaving it unused most of the time.

    Think about it: does a convenience feature really improve your life if you don’t use it regularly?

    Double Sinks: An Upgrade That Might Not Be Worth It

    Double sinks on kitchen islands are often seen as a sign of luxury. They promise separation between prep and cleanup zones. But the reality is that many people use the main sink for almost everything.

    The secondary sink often becomes a spot for leftover dishes or random items instead of serving its intended purpose. It’s a classic example of design over function.

    When you’re budgeting for kitchen upgrades, ask yourself: Will this feature truly enhance my daily routine or just add complexity?

    The Smart Choice: Flexibility Over Fixed Design

    Instead of locking yourself into a specific appliance or layout, go for a flexible approach. A simple section of countertop with good storage, shelves, and room for a countertop coffee machine gives you the same dedicated coffee area without the hassle.

    This kind of design allows you to change your setup as needs evolve. It also avoids the risk of investing in something that becomes outdated or unmanageable.

    Experts recommend focusing on drawer organizers and drawer dividers for better functionality in smaller spaces, or closet organizers for maximizing storage efficiency. These aren’t flashy—but they work.

    Common Mistake: Prioritizing Aesthetics Over Usability

    One of the biggest mistakes homeowners make is choosing features based solely on how they look. While aesthetics matter, usability should come first. A beautiful kitchen that doesn’t serve your lifestyle is just an expensive decoration.

    That said, it’s not about rejecting all luxury features. It’s about choosing wisely. Ask yourself: Does this add genuine value to my everyday life?

    FAQ

    How do I determine if a kitchen feature is worth the investment?

    Start by evaluating how often you’ll use it. If it’s something you’d use daily or multiple times a week, it’s likely worth it. If it’s only used once in a while, consider whether the cost and maintenance justify it.

    What’s a better alternative to built-in appliances?

    A flexible, modular setup with countertop options offers more adaptability and lower maintenance. You can upgrade or replace parts easily without redoing the whole space.

    Are there any luxury features that actually pay off?

    Yes. Features like closet organizers or drawer organizers that improve daily efficiency and reduce clutter are often worth the investment because they offer consistent benefits.

    What Should You Do Next?

    If you’re planning a kitchen upgrade, resist the urge to go for the most visually impressive option. Instead, focus on what enhances your daily routine. Consider investing in smart storage solutions like drawer dividers or drawer organizers that make your space more functional and less cluttered.

    Remember, the smartest luxury is the one that doesn’t disappear into the background—because it actually gets used.

    Final Thoughts

    As you plan your next kitchen upgrade, challenge the assumption that more is always better. Sometimes, simplicity wins over spectacle. And in a world where we’re constantly told to “have it all,” maybe the most powerful choice is to keep it simple—and make sure it works for you.

    What luxury feature in your home have you found yourself avoiding lately? Share your experience—we’d love to hear your story.

  • When to Swap a Light for a Ceiling Fan (And When to Call a Pro)

    When to Swap a Light for a Ceiling Fan (And When to Call a Pro)

    You’re standing under that sad, single bulb fixture in the center of your bedroom for the third time this month, sweating through your shirt, wondering why you haven’t fixed this yet. It’s not just about comfort—though that’s plenty important—it’s about the energy bill creeping higher every summer. But here’s what most weekend warriors don’t realize: swapping a standard ceiling light for a fan isn’t always the simple hardware hack it appears to be. Sometimes that innocent-looking fixture is hiding electrical realities that turn a $150 project into a $600 lesson.

    The good news? If your home was built after 1985 and you’re comfortable with basic tools, this is likely a manageable Saturday project. But the line between “totally doable” and “call an electrician before you hurt yourself” is thinner than most DIY guides admit. Let’s walk through exactly what you’re facing, step by step, with the specific checkpoints that determine whether you’re pulling out your toolbox or pulling up your electrician’s number.

    The Energy Payoff: Why This Swap Actually Matters

    Before we get into the nuts and bolts, let’s talk about why you’d bother. A ceiling fan isn’t just aesthetic—though the right fixture can absolutely anchor a room’s design, much like how statement furniture pieces are reshaping patio trends in celebrity homes. The real value is operational.

    In summer, a ceiling fan creates a wind-chill effect that can make a room feel 4 to 6 degrees cooler than it actually is. That means you can set your thermostat higher without sacrificing comfort. The Department of Energy estimates that a ceiling fan allows you to raise your thermostat by about 4 degrees with no reduction in comfort. Over a hot season, that’s real money.

    But here’s what most people forget: fans cool people, not rooms. A ceiling fan running in an empty room is just wasting electricity. The moment you leave, the switch goes off. This isn’t a passive system like central air—it’s an active, on-demand cooling tool.

    Winter performance is the hidden bonus. By reversing the blade direction (most fans have a small switch on the motor housing), you push warm air trapped at the ceiling back down into the living space. In rooms with high ceilings or poor insulation, this can reduce heating costs by recirculating air you’ve already paid to heat.

    The Critical Safety Check: What’s Actually In Your Ceiling?

    This is where the project succeeds or fails before you’ve bought a single tool. Not all ceiling boxes are created equal, and the one holding your current light fixture might not be rated for a fan’s weight and vibration.

    Standard light fixture boxes are typically designed to hold 6 to 10 pounds. A ceiling fan weighs 15 to 50 pounds and creates lateral stress every time the blades spin. Install a fan on an underspec’d box, and you’re inviting a scenario where the whole assembly pulls out of the ceiling—potentially while spinning.

    Fixture Type Weight Capacity Vibration Rating Fan-Safe?
    Standard plastic outlet box 6-10 lbs None No—never install a fan here
    Standard metal outlet box 10-15 lbs Minimal Only for very small fans under 15 lbs
    Fan-rated ceiling box 35-70 lbs High (vibration dampening) Yes—required for most fans
    Fan-rated box with brace 70+ lbs High Yes—required for heavy fans

    How do you know what you have? You’ll need to remove the current fixture to inspect the box. Turn off the breaker (not just the wall switch—working on a live circuit is how DIYers get hurt), remove the fixture canopy, and look at the box itself. A fan-rated box will be clearly marked, usually with a label indicating it’s rated for ceiling fan support. If you see a plastic box or an unmarked metal box nailed to a joist, assume it’s not rated for a fan.

    Working with electricity is inherently dangerous. If you’re unsure about any step—especially wiring or box installation—consult a licensed electrician. Electrical work must comply with local codes, and improper installation can create fire hazards or injury risks.

    Tools and Materials: What You Actually Need

    Hardware stores love selling “complete ceiling fan installation kits.” Skip them. You likely have half the tools already, and the other half are worth buying individually for better quality.

    Essential tools:

    • Voltage tester—non-contact models are inexpensive and essential for confirming power is truly off
    • Screwdriver set—both Phillips and flathead, in multiple sizes
    • Needlenose pliers—for wire manipulation and bending wires around terminals
    • Adjustable wrench—for securing downrod nuts and mounting hardware
    • Ladder—tall enough to work comfortably at the ceiling height; reaching awkwardly is how accidents happen

    Materials you may need:

    • Fan-rated ceiling box—if your existing box isn’t rated
    • Fan support brace—if installing between joists or your current box lacks structural support
    • Wire connectors—typically included with the fan, but have extras on hand
    • Electrical tape—for securing wire nuts and providing an extra layer of insulation

    If you need to replace the ceiling box and don’t have attic access, you’ll also need a keyhole saw to cut into the drywall. This is where projects can expand in scope—cutting into your ceiling to install proper support isn’t difficult, but it does mean patching and painting afterward.

    The Installation Process: Step by Step

    Let’s walk through the actual swap, assuming your ceiling box is fan-rated or you’ve already upgraded it.

    Step 1: Confirm power is off. Flip the breaker, then use your voltage tester at the fixture wires. Touch the tester to the black (hot) wire and the white (neutral) wire. The tester should show zero voltage. If it lights up or beeps, you’ve got the wrong breaker—find the right one before proceeding.

    Step 2: Remove the existing fixture. Unscrew the mounting screws holding the fixture to the ceiling box. Lower the fixture gently, exposing the wiring. Disconnect the wire nuts connecting the fixture wires to the house wires. Note the configuration: typically, black to black, white to white, and a bare copper or green wire to ground.

    Step 3: Install the mounting bracket. Most fans come with a universal mounting bracket that attaches to the ceiling box. Secure it with the provided screws, making sure it’s tight. Any wobble here will amplify at the blades.

    Step 4: Assemble the fan. Follow your fan’s specific instructions, but generally you’ll attach the downrod to the motor, thread the wires through, and secure with a set screw. If you’re installing a flush-mount fan, skip the downrod entirely.

    Step 5: Hang the fan. Most brackets have a hook or temporary support to hold the fan while you wire it. Use it. Wrestling a 30-pound fan in one hand while wiring with the other is a recipe for frustration and dropped screws.

    Step 6: Make the electrical connections. Connect black to black (hot), white to white (neutral), and ground to ground (bare copper or green). Secure each connection with a wire nut, twisting clockwise until tight. Wrap the wire nuts with electrical tape for extra security. Tuck the wires carefully into the ceiling box—overstuffing can prevent the canopy from sitting flush.

    Step 7: Attach the canopy and blades. Slide the canopy up to the ceiling and secure with screws. Attach the blades to the blade irons, then to the motor. Follow the blade attachment sequence in your manual—some fans require a specific order to ensure balance.

    Step 8: Test before finishing. Flip the breaker back on. Test the fan at all speeds. Listen for unusual sounds and watch for wobble. If everything runs smoothly, turn the power back off and install the light kit (if applicable) and globes.

    Common Mistakes That Cost Time and Money

    Even with solid instructions, DIYers make predictable errors. Here are the ones I see most often:

    Mistake #1: Skipping the balance check. A wobbling fan isn’t just annoying—it puts stress on the motor and mounting hardware, shortening the fan’s lifespan. Most fans include a balancing kit. Use it. If the fan still wobbles after installation, the blades may be uneven; try swapping two blades to see if the wobble moves.

    Mistake #2: Ignoring blade clearance. You need at least 7 feet of clearance between the floor and the blade tips, and ideally 8 to 10 inches between the blades and the ceiling. Blade tips should be at least 18 inches from walls. Cramped installations reduce efficiency and create safety hazards.

    Mistake #3: Using the wrong downrod length. Standard fans come with a short downrod designed for 8-foot ceilings. If your ceiling is higher, you need a longer downrod to position the fan in the occupied zone. For ceilings over 9 feet, the fan should hang 8 to 9 feet from the floor for optimal airflow.

    Mistake #4: Forgetting about the weight. Heavy fans—particularly those with integrated lights or decorative elements—may require additional support beyond a standard fan-rated box. If you’re installing a substantial fixture, consider a brace that spans between ceiling joists.

    When to Call a Professional

    There’s no shame in recognizing when a project exceeds your comfort level. Consider calling an electrician if:

    • Your existing box isn’t fan-rated and you lack attic access for replacement
    • You discover knob-and-tube wiring or aluminum wiring in an older home
    • The existing wiring doesn’t include a ground wire
    • You need to run new wire to add a fan where no fixture currently exists
    • You’re installing a fan on a sloped or vaulted ceiling requiring specialized mounting

    Professional installation typically costs $100 to $400, depending on complexity. That’s not cheap, but it’s less expensive than emergency room bills or repairing a fan that ripped out of your ceiling.

    FAQ

    Can I install a ceiling fan if there’s no existing fixture?

    Yes, but it’s significantly more involved. You’ll need to run electrical wiring from a power source, install a fan-rated box, and potentially cut into walls and ceilings. This is typically beyond DIY scope unless you have electrical experience.

    Do I need a permit to install a ceiling fan?

    Most municipalities don’t require permits for simple fixture swaps, but requirements vary. If you’re running new wiring or modifying your electrical panel, a permit may be required. Check with your local building department.

    How long does installation take?

    For a straightforward swap with a fan-rated box already in place, expect 2 to 3 hours. If you need to replace the ceiling box or make modifications, add another 1 to 2 hours.

    What to Do Next

    If you’ve confirmed your ceiling box is fan-rated and you’re comfortable with basic electrical safety, this is a solid weekend project. Start by measuring your room to determine the right fan size—36 to 44 inches for rooms up to 144 square feet, 44 to 54 inches for rooms 144 to 225 square feet, and larger fans for bigger spaces.

    Before purchasing, consider what you actually need. If you live in a climate with mild summers, a simple fan without integrated lighting might suffice. In hotter regions, invest in a quality fan with a strong motor and consider integrated LED lighting for rooms that need both.

    The right ceiling fan does more than cool a room—it changes how you experience your space. But that experience depends entirely on proper installation. Take your time, verify each step, and when in doubt, call someone who does this every day.

  • Beyond Boxwood: 7 Smarter Hedges for a Low-Maintenance Landscape

    Beyond Boxwood: 7 Smarter Hedges for a Low-Maintenance Landscape

    You spent a small fortune installing that pristine boxwood hedge. Three years later, you’re battling blight, chasing fungus, and wondering why your “low-maintenance” border demands more attention than a newborn. The dirty secret of landscape design is that boxwood is high-maintenance royalty—beautiful, yes, but prone to disease, demanding of water, and tedious to trim into that perfect geometry. If you want the structure without the struggle, it is time to look beyond the default option and toward alternatives that actually work in real-world conditions.

    The Real Cost of Sticking with Boxwood

    Boxwood has been the go-to for formal gardens for centuries, gracing everything from the Kennedy family’s legendary estates to modest suburban front yards. But popularity has bred problems. Boxwood blight is now rampant in many regions, turning lush green hedges into brittle, brown skeletons. Even without disease, boxwood requires consistent trimming to maintain its shape and struggles in the kind of poor, compacted soil found in new developments.

    The usual alternatives—Arborvitae, Holly, and Yew—are often just different versions of the same problem. They offer the structure, sure, but they bring their own baggage: leggy growth, pest susceptibility, or a dull, one-note color palette. A truly smart landscape swap doesn’t just copy the shape of boxwood; it improves upon it with better heat tolerance, disease resistance, and seasonal interest.

    7 Alternatives That Outperform the Classic Hedge

    Replacing a staple like boxwood requires plants that are tough, adaptable, and structurally sound. These seven options don’t just imitate boxwood; they solve the problems boxwood creates.

    1. Pittosporum (Pittosporum tobira)

    If you live in a warmer climate and deal with heat that would fry a boxwood, Pittosporum is your answer. It handles poor soil and drought with ease, offering whorls of glossy green leaves that look pristine even when you ignore them for a week. It grows larger than a typical boxwood—reaching 8 to 12 feet—but can be easily maintained at a lower height. The added bonus? Fragrant orange-blossom scent when it blooms.

    2. Hebe (Hebe spp.)

    For those who want a more refined, modern look, Hebe offers a compact, architectural form. Originating from New Zealand, many varieties feature a striking variegated leaf or a dense, almost plastic-perfect texture that requires zero fuss. They are perfect for smaller borders or containers where you want a “set it and forget it” vibe, though they do prefer a spot protected from harsh, drying winds.

    3. Teucrium (Germander)

    This is the secret weapon for knot gardens and low edging. Teucrium offers a fine texture similar to boxwood but with aromatic, silver-green foliage that deer typically despise. It takes trimming exceptionally well and produces spikes of purple flowers in the summer, adding a layer of color boxwood never could. It is ideal for defining herb gardens or creating intricate parterre patterns without the fungal risks.

    4. Lonicera nitida (Box Honeysuckle)

    Don’t let the word “honeysuckle” scare you; this isn’t the invasive vine strangling your fence. Lonicera nitida is a shrub with tiny, dark green leaves that grow so densely they practically form a wall. It grows faster than boxwood, meaning you get a full hedge in half the time, but it does require a trim once or twice a year to keep it tidy. It’s a workhorse for creating privacy screens on a budget.

    5. Euonymus japonicus (Japanese Euonymus)

    Often overlooked because of its ubiquity, the Japanese Euonymus is actually a powerhouse for coastal and urban environments. It tolerates salt spray, pollution, and reflected heat from driveways. Look for varieties like ‘Green Spire’ for a tight, columnar shape that mimics the formality of boxwood without the high disease risk. Just ensure you give it good air circulation to avoid powdery mildew.

    6. Corokia (Corokia cotoneaster)

    This New Zealand native is for the design-savvy gardener who appreciates a bit of wildness within structure. Corokia has a unique, zig-zagging branch structure with tiny leaves, giving it a textural quality that boxwood lacks. It creates a slightly more open, windswept look but still responds well to pruning. It is particularly stunning in modern, minimalist landscapes.

    7. Santolina (Lavender Cotton)

    For the ultimate low-hedge in a sunny, dry spot, Santolina is unmatched. Its feathery, silver foliage provides a striking contrast to the deep greens typical of formal gardens. It thrives on neglect—overwatering is actually its biggest enemy. Use it for low borders around rose gardens or pathways where you want to introduce a soft, aromatic element.

    Plant Best For Maintenance Key Advantage
    Pittosporum Heat/Drought Low Handles poor soil
    Hebe Modern/Containers Very Low Architectural texture
    Teucrium Knot Gardens Medium Deer resistant
    Lonicera nitida Privacy Screens Medium Fast growth rate
    Euonymus Urban/Coastal Low Pollution tolerant
    Corokia Modern Design Low Unique texture
    Santolina Dry/Sunny Spots Very Low Drought tolerant

    Container Gardening: The Flexible Alternative

    Not everyone has the space for a sprawling hedge. If you are working with a balcony, patio, or small courtyard, shifting your strategy to containers can offer the structure you crave without the commitment of in-ground planting. This is where compact azaleas shine.

    Unlike the sprawling azaleas of the past, modern compact varieties are bred specifically for pots. They offer a dense, rounded shape that provides structure, but with a burst of color that a green hedge can’t match. Some varieties, like the ‘Encore’ series, actually rebloom throughout the season, giving you spring flowers in spring and again in late summer. This solves the “one-hit wonder” problem of traditional hedges that look static for 10 months of the year.

    “The biggest mistake people make with container hedges is treating them like temporary decorations. A pot is a micro-ecosystem; you need to water and feed it consistently because the roots can’t reach out to find nutrients on their own.”

    Designing for Your “Season of Life”

    Preparing your outdoor space is deeply personal, much like preparing a nursery for a new arrival or rethinking a living room for a new phase of life. Just as Hailee Steinfeld curated her home for her next “season of life” as a new mom, your landscape choices should reflect your reality, not a magazine ideal.

    If you are in a phase where time is your most valuable asset, swapping a high-maintenance boxwood for a rugged Pittosporum or a set of compact azaleas in pots is a practical act of self-care. It’s about building a home environment that supports you, rather than demanding your constant labor. A well-designed landscape shouldn’t feel like another item on your to-do list; it should be the backdrop that makes the rest of your life feel calmer.

    FAQ

    How often do these alternatives need trimming compared to boxwood?

    Most of these alternatives, particularly Pittosporum and Santolina, require significantly less trimming than boxwood. While boxwood often needs 2-3 trims per season to look sharp, many of these options only need a light shearing once a year to maintain their shape, unless you desire a highly formal, geometric look.

    Can I mix these plants in a single hedge?

    You can, but it requires planning. Mixing species creates a more natural, tapestry effect, but you must ensure all plants have similar water and light requirements. For example, pairing a drought-tolerant Santolina with a thirsty plant would cause issues. Stick to plants with compatible needs for the best results.

    Are these alternatives safe for pets?

    Always check specific toxicity for your pets, but generally, plants like Lonicera nitida (Box Honeysuckle) can be mildly toxic if ingested in large quantities. If you have a dog that likes to chew on branches, Teucrium or Santolina are often safer, more aromatic deterrents.

    What to Do Next

    If your current hedges are struggling or you are planning a new installation, don’t default to the old standards. Audit your space: Is it hot and dry? Shaded and damp? Choose an alternative that matches your specific conditions rather than fighting against them. Visit a local nursery to see these plants in person—texture and density are best judged in real life. Your landscape should be a source of pride, not a source of stress. Choose the plants that work harder, so you don’t have to.

    Conclusion

    The perfect hedge isn’t about following tradition; it’s about finding the right fit for your soil, your climate, and your schedule. By looking past the boxwood monopoly, you gain access to a world of texture, color, and resilience that makes your home feel more polished and less demanding. The question isn’t why you should switch, but why you haven’t done it sooner.

  • How to Transform Your Home with $200 Updates & Smart Furniture Choices

    How to Transform Your Home with $200 Updates & Smart Furniture Choices

    What if you could completely reframe your living space with just a few strategic tweaks and a single color choice? That’s exactly what happened in two homes featured by Apartment Therapy. One bedroom went from boring to breathtaking using an unexpected wall color and an IKEA hack. Another 1977 home was transformed from ‘zero’ to ‘WOW’ with a budget-friendly update that cost less than $200. These aren’t just stories of luck—they’re examples of smart design decisions that anyone can replicate.

    Why Small Changes Can Have Maximum Impact

    Often, people overlook the power of low-cost, high-impact improvements. But the truth is, small changes—especially those involving color, layout, and furniture placement—can redefine a room’s energy. Whether you’re working with a cramped backyard or a dated kitchen, these transformations prove that a little thought and creativity go a long way.

    “Small DIY changes went a really long way in making this 1977 house look totally fresh.”

    This quote from a Apartment Therapy project reminds us that even the most outdated homes can be revitalized without breaking the bank. And while some may assume a full renovation is needed, it’s often the subtle shifts that make the biggest difference.

    The Power of Color and Strategic Design

    Color is more than just decoration—it’s emotional architecture. In one project, a teal wall molding transformed a bland bedroom into a cozy retreat. This isn’t just about painting walls; it’s about creating visual interest and defining a mood.

    Consider this: a room painted in neutral tones can feel flat and uninspired. But introduce a bold accent wall or a unique trim color, and suddenly the space feels intentional and curated. That’s the magic of strategic color choices.

    Design Element Before After
    Wall Color White or beige Teal with molding detail
    Cost N/A $50–$100
    Impact Bland, uninspired Warm, inviting, modern

    Smart Furniture Choices for Outdoor Spaces

    While indoor transformations are powerful, outdoor design is where many homeowners fall short. Too often, backyards are treated like afterthoughts—just a place to throw furniture around. But 2026 is shifting that narrative.

    Modern backyard design is now focused on structured layouts where furniture acts as a foundation for defining zones. From modular lounges to corner dining setups, the right pieces don’t just fill space—they create function and flow.

    One standout idea is using low-profile outdoor sofas that open up views instead of blocking them. This allows the eye to travel freely across the yard, making even small spaces feel larger and more cohesive.

    “Furniture is no longer treated as something added at the end. It becomes the element that defines zones…”

    Kitchen Organization: Beyond the Standard Dish Rack

    When it comes to kitchens, clutter isn’t just annoying—it’s inefficient. Traditional dish racks are being replaced with smarter, more integrated solutions. A modern approach involves under-mounted sinks or sleek pull-out trays that keep everything within reach while maintaining clean lines.

    Take the example of a peach and green kitchen featuring a butler sink. Not only does this setup offer a fresh aesthetic, but it also improves workflow by placing items exactly where you need them. No more rummaging through cabinets or struggling with awkward dish placement.

    Solution Pros Cons
    Under-mounted Sink Keeps workspace clean, easy access Higher installation cost
    Standard Dish Rack Low cost, widely available Clutter-prone, limited functionality

    How to Choose the Right Updates for Maximum Impact

    You might wonder which changes offer the best return on investment. Here’s how to prioritize:

    • Color first: A single accent wall can instantly elevate a room.
    • Furniture layout: Define zones early in your redesign process.
    • Storage solutions: Invest in clever storage that keeps things organized but visible.

    One common mistake is assuming that bigger renovations equal better results. Often, the opposite is true. A few well-placed updates—like adding a new dining table or repositioning a sofa—can have more impact than an entire remodel.

    FAQ

    How much does a backyard redesign typically cost?

    A backyard redesign can range from $500 to $5,000 depending on materials and scope. For a low-lift update, expect to spend between $200 and $800 for new furniture and layout changes.

    What are the top trends for outdoor furniture in 2026?

    Key trends include modular seating, low-profile designs, and zone-defining structures like pergolas. These elements work together to create functional yet stylish outdoor environments.

    Can I transform my kitchen without a full overhaul?

    Absolutely. Focus on updating hardware, installing pull-out trays, and choosing a bold backsplash. These small changes can make a big difference in both aesthetics and usability.

    What Should You Do Next?

    If you’ve been feeling stuck in your current space, start small. Pick one area—whether it’s a bedroom wall or your backyard seating arrangement—and apply the principles outlined here. Try a bold paint color or rearrange your furniture to define zones. These aren’t just quick fixes—they’re foundations for a more intentional, organized lifestyle.

    And remember: the most impactful changes don’t always require a budget. Sometimes, a fresh perspective and a few simple swaps are all you need to turn a space from ordinary to extraordinary.

    Final Thought: What’s Next for Home Design?

    As we move deeper into 2026, the line between indoor and outdoor living continues to blur. The future of home design lies not just in beauty, but in functionality and flow. So ask yourself: how can I make every room—and every outdoor corner—feel intentional and lived-in?

  • How to Declutter Your Home in 3 Simple Steps — No Stress, Maximum Impact

    How to Declutter Your Home in 3 Simple Steps — No Stress, Maximum Impact

    What if I told you that you could declutter your entire home in less than an hour — without feeling overwhelmed or losing your mind? Sounds too good to be true? It’s not. The secret lies in understanding how to prioritize what truly matters in your space, and how to make decisions quickly and confidently. If you’ve ever felt stuck trying to organize your home, or wondered why you keep buying things you don’t actually need, this guide is for you.

    Why Decluttering Isn’t Just About Tidiness

    Most people think decluttering means getting rid of stuff — but it’s so much more than that. Decluttering is about creating clarity, reducing stress, and making room for what actually brings joy or utility into your life. And here’s the kicker: it doesn’t require expensive tools or a complete overhaul. In fact, it starts with one simple shift in mindset.

    Take the example of a popular home organization expert who swears by a 3-second rule when organizing — a method that works whether you’re tackling a cluttered closet or a chaotic kitchen counter. This isn’t just a gimmick. It’s based on a core principle: if something takes less than 3 seconds to handle, do it now. That means sorting through mail, putting away dishes, or moving items to their proper place immediately instead of letting them pile up.

    This kind of micro-decision-making creates momentum. You’re not fighting against inertia — you’re working with it. Before you know it, your space feels more manageable, and you’ll find yourself doing these actions automatically. Why does this matter? Because consistency beats perfection every time. You don’t need to spend hours cleaning to feel better about your environment — you just need to take small steps that compound over time.

    What Happens When You Declutter Without a Plan?

    Many people jump into decluttering with enthusiasm, only to end up frustrated and confused. They grab everything from the closet, toss it onto the bed, and then struggle to decide what to keep, donate, or throw away. That’s where most efforts fall apart.

    But here’s a lesser-known truth: decluttering without intention is chaos. You’re not just getting rid of physical objects — you’re clearing mental clutter too. That’s why it’s essential to approach decluttering like a strategic project, not a spontaneous cleanup.

    Think of it this way: before you start, ask yourself “what am I trying to achieve?” Are you looking to reduce stress? Create more space for guests? Or simply make your home easier to maintain? Once you define your goal, the process becomes much clearer. For instance, if your aim is to simplify your morning routine, focus on organizing your bedroom and bathroom first — not your garage or pantry.

    Here’s a key tip from a top interior designer: don’t declutter everything at once. Instead, pick one area and work through it systematically. Focus on one drawer, one shelf, or one room at a time. That way, you won’t burn out, and you’ll actually stick with it.

    How to Build a Sustainable Decluttering Routine

    Decluttering once a month isn’t enough. You need a system that keeps your space fresh and functional long-term. So how do you build that? Start by asking yourself: what habits can I adopt to prevent clutter from building up again?

    One effective strategy is to implement the one-in, one-out rule: whenever you bring something new into your home, remove an old item. It sounds simple, but it prevents accumulation. For example, if you buy a new pair of shoes, donate or sell an old pair. This keeps your belongings in check and helps you stay mindful of what you own.

    Another powerful habit is to do a quick 5-minute daily review. Set a timer and go through each room for five minutes. Pick up anything that looks out of place, put away items left out, and move things back where they belong. This is especially helpful for busy households. Why does this matter? Because small actions consistently applied lead to big results over time.

    And here’s a pro tip: use storage solutions that match your lifestyle. Whether it’s closet organizers for clothing or drawer dividers for utensils, investing in smart storage makes maintaining order effortless. You don’t have to choose between aesthetics and function — you can have both.

    What to Do When You Feel Overwhelmed

    There’s nothing worse than starting a decluttering project and suddenly feeling overwhelmed. It happens to everyone. But here’s the thing: feeling overwhelmed is normal — it’s part of the process. The key is knowing how to manage those feelings so you don’t give up.

    Try breaking down large tasks into smaller chunks. Instead of tackling your whole attic, focus on one box at a time. Or, if you’re feeling emotionally attached to certain items, set aside a special day to sort through sentimental objects separately. Don’t rush it. Let yourself feel the weight of memories, but also remember that keeping too much can actually diminish the impact of those moments.

    Also, consider the emotionally intelligent approach to decluttering. Ask yourself: does this item serve me now? If not, let it go. If it does, make sure it’s easy to access and visible. You want to keep things that bring value — not just things that remind you of someone or something from the past.

    Remember, decluttering isn’t about perfection — it’s about progress. Why is that important? Because if you wait until everything is perfect to start, you’ll never begin. The best time to declutter was yesterday. The second-best time is right now.

    Which Tools Actually Make a Difference?

    When it comes to organizing, not all tools are created equal. Some are trendy, others are practical — and a few are absolutely game-changers. Let’s talk about what really works.

    Take the humble candle warmer, for example. Yes, it’s a decorative piece, but it also serves a functional purpose. A quality candle warmer like the $20 chic model mentioned in recent reviews can extend the life of your favorite scented candles by up to twice as long. That’s not just about saving money — it’s about enhancing your sensory experience. A warm, inviting scent can transform a drab hallway into a cozy retreat.

    Similarly, investing in smart storage solutions pays dividends. Whether it’s a closet organizer that maximizes vertical space or a drawer system that keeps small items sorted, these investments help you maintain order without constant effort.

    But here’s what many people miss: the most powerful tool isn’t a gadget — it’s your decision-making process. You don’t need to buy fancy bins or labels. You just need to be intentional about what you bring into your home and how you treat the things you already have.

    What’s Next After Decluttering?

    Once you’ve cleared out the excess, what do you do with your newly freed-up space? This is where many people get stuck — they don’t know how to fill it meaningfully.

    Start by thinking about functionality and flow. Where do you spend the most time? What activities happen in each room? Then, arrange furniture and storage accordingly. For example, if you love cooking, ensure your kitchen has easy access to spices, tools, and ingredients. If you read often, create a quiet corner with a comfortable chair and good lighting.

    Don’t forget to incorporate elements that reflect your personal style. Whether it’s a fresh spring color palette or a curated collection of plants, your space should feel like a reflection of who you are — not just a blank canvas waiting to be filled.

    Finally, remember to maintain your new system. Set weekly reminders to tidy up, revisit your one-in-one-out policy, and reassess your priorities. Decluttering is a journey, not a destination. And the more you practice, the easier it becomes.

    Final Thoughts: Is Your Home Really Yours?

    Decluttering isn’t just about getting rid of things — it’s about reclaiming control over your environment and your life. When you stop accumulating unnecessary items, you free up mental energy for what truly matters. But here’s a question worth pondering: are you living in a space that supports your goals, or are you just surviving in it?

    Maybe it’s time to ask yourself: what would I do differently if I knew I had unlimited time and resources? That’s the kind of thinking that leads to transformation — not just in your home, but in your entire life.

  • Complete Guide to Stylish Small-Space Storage and Decluttering

    Complete Guide to Stylish Small-Space Storage and Decluttering

    A 753-square-foot apartment can feel airy, intentional, and calm—or it can feel like a storage unit with a sofa. The difference isn’t square footage. It’s strategy. Right now, more people are trying to make small homes work harder (often with a kitchen that has to store everything and a living room that has to do everything), and the smartest solutions are surprisingly simple: a few flexible containers, a design theme that controls visual noise, and low-maintenance greenery that adds life without adding chores.

    Design a “visual system” first, then organize into it

    Decluttering usually starts with a trash bag. But lasting organization starts with something less obvious: a visual system. When a home has a coherent design language—materials, colors, and a repeated motif—storage looks like decor instead of clutter. That’s why small spaces benefit so much from a strong but subtle theme. A non-cheesy nautical spin, for example, can guide choices toward streamlined shapes, lighter woods, and crisp contrasts, so even functional items feel deliberate rather than random.

    Use the same approach even if you never say “theme” out loud. Pick 2–3 core materials and stick to them in your storage decisions:

    • Natural fibers (jute, cotton, rattan) for warmth and texture
    • Light woods or pale neutrals to keep small rooms from feeling heavy
    • One accent tone (navy, black, or brass) to make containers and hardware look coordinated

    This is where organization and interior design stop fighting each other. Once your storage “belongs” visually, you’re more likely to put things away—because it doesn’t feel like you’re ruining the room every time you tidy up.

    Swap bulky containers for flexible, low-waste storage in the kitchen

    Summer kitchens get chaotic fast: produce on the counter, snacks for outings, extra herbs, and odds and ends that don’t fit neatly in a pantry. Instead of adding more hard plastic bins, consider flexible storage that collapses when not needed. Lightweight jute-and-cotton bags are a standout option because they pull double duty: they reduce single-use packaging and help keep everyday foods contained without demanding permanent shelf space.

    One of the most practical upgrades is adding a small set of reusable food storage bags—some options cost as little as $6, making it an easy experiment with a high payoff. Use them to create instant “zones” in cabinets and drawers:

    • Breakfast grab zone: oatmeal packets, tea bags, coffee filters
    • Snack station: granola bars, nuts, dried fruit
    • Produce support: onions or garlic stored neatly (and easy to move off the counter)

    For maximum order, pair flexible bags with structured dividers so small items don’t migrate. A set of Drawer Organizers can turn one messy kitchen drawer into a predictable layout where bags, clips, and wraps each have a lane.

    Actionable tip: Create a “one-hand rule” for your kitchen: if you can’t grab the item and close the cabinet with one hand, you probably have too many loose micro-items. Consolidate them into bags or small bins until the one-hand rule feels natural.

    Choose statement greenery that doesn’t create maintenance clutter

    Plants make a home look finished. But high-maintenance plants can quietly create a new category of clutter: grow lights, special fertilizers, dropped leaves, and constant repositioning. If you want the impact of a dramatic indoor tree without the drama, consider a lower-maintenance alternative to the famously finicky fiddle leaf fig: Ficus Audrey.

    From an organization perspective, Ficus Audrey earns its place because it can deliver the same sculptural, interior-design punch as trendier options while being easier to live with. Placed next to a textured piece like a rattan chair, it brings height and softness—two qualities that make small spaces feel more layered and “designed,” even when you’re hiding storage in plain sight.

    To keep plant care from becoming countertop clutter, set up a tiny, contained plant station:

    • One watering can (stored under the sink or on a dedicated shelf)
    • A single tray for pruning scissors and wipes
    • One bag/bin for spare potting supplies, kept out of sight

    Actionable tip: Limit yourself to one plant-care container per room. If supplies don’t fit, you have too many supplies—or too many plant-care “extras.” This boundary keeps the plant from becoming an organizational project.

    Make small spaces feel larger with hidden storage and “zone thinking”

    When a home is under 1,000 square feet, every surface becomes a magnet. The antidote is zone thinking: assign each activity (music, lounging, working, eating) a defined footprint, then build storage that supports it. This is especially powerful in multifunctional rooms where one person’s hobby can quickly colonize the entire apartment.

    Start by mapping your home into micro-zones:

    • Landing zone: keys, bags, sunglasses
    • Media zone: speakers, records, remotes
    • Care zone: laundry, cleaning tools, refills
    • Calm zone: reading chair, plant, throw blanket

    Then decide what gets to be visible. In small spaces, “pretty clutter” still reads as clutter unless it’s extremely edited. A cohesive interior direction—like clean nautical cues without novelty—helps you keep only what supports the vibe. If it doesn’t match the system, it’s easier to let it go.

    Finally, upgrade your highest-friction storage area: the closet. Closet overload often spills outward into bedrooms and living rooms, turning chairs into wardrobes and floors into staging areas. Adding Closet Organizers creates vertical structure so you can store more while seeing less—an essential trick for making a compact home feel calm.

    Practical recommendation: If you’re unsure where to invest first, choose the storage upgrade that removes items from sightlines. In a small apartment, clearing visual clutter (open shelves, chair backs, countertops) delivers a bigger perceived “space gain” than perfecting a hidden drawer.

    A simple 30-minute reset routine that keeps it all working

    The best systems don’t require weekend-long cleanouts to stay functional. They rely on short resets that prevent drift. Try this 30-minute routine once a week:

    • 10 minutes: Return kitchen items to their zones (bags, clips, snacks, produce)
    • 10 minutes: Clear one high-visibility surface (entry table, coffee table, counter)
    • 10 minutes: Quick care sweep (water the plant if needed, toss wilted greens, restock one essential)

    This works because it aligns with how small homes fail: one or two “hot spots” overflow, then everything feels messy. A short, predictable reset keeps your visual system intact and your storage doing its job.

    Key takeaways: Choose a cohesive design direction so storage looks intentional, use flexible reusable bags to reduce kitchen clutter and waste, and opt for low-maintenance greenery like Ficus Audrey for high style with less fuss. Build zone-based storage—especially in closets and drawers—so the items you use daily never compete for space. With a consistent weekly reset, your home can stay organized as your needs change, season after season.

  • Essential Home Organization Guide: Seal, Store, and Simplify

    Essential Home Organization Guide: Seal, Store, and Simplify

    More than 10,000 Amazon shoppers recently snapped up a single mason-jar accessory—proof that the organization tools people want right now aren’t always big, expensive systems. They’re small, smart upgrades that make everyday storage cleaner, faster, and less wasteful. Pair that kind of micro-innovation with seasonal sale momentum on practical tools and you get a clear trend: homeowners are investing in solutions that reduce clutter, protect what they own, and make hosting or weekend chores feel effortless.

    Small Storage Upgrades That Make a Big Difference

    If your pantry shelves feel like a constant game of “stack and pray,” you’re not alone. The quickest wins often come from improving the containers you already use—especially mason jars. A key reason mason jars are beloved for pantry organization is their uniform footprint: they line up neatly, they’re transparent, and they’re easy to label. The weak point is the seal. When dry goods go stale (or invite pests), you don’t just lose food—you create more mess and more decision fatigue.

    That’s where a jar-sealing gadget becomes a genuinely functional decluttering tool. By pulling air out of the jar and creating a tight seal, it helps extend freshness for items like flour, coffee, nuts, dehydrated snacks, and baking staples. The result is fewer half-used bags clipped shut with random clips, fewer bulky boxes, and less “mystery pantry inventory” that you forget to use.

    Actionable tip: set up a two-zone jar system

    • Everyday zone: Keep 6–10 jars in consistent sizes for high-rotation goods (oats, rice, pasta, sugar). Uniform sizing makes shelves look calmer and keeps re-stocking simple.
    • Backstock zone: Use larger jars (or duplicate jars) for overflow so you don’t buy duplicates of what you already own.

    For an even bigger impact, match your jar system with a “zero loose tools” drawer rule—scoops, bag clips, and labels should live in one designated area using Drawer Organizers so you never have to hunt for the basics while cooking.

    Pantry-to-Party Organization: Hosting Without the Kitchen Chaos

    Organization isn’t just about hiding clutter; it’s about building a home that can flex for real life. Consider the classic party stressor: snacks and appetizers that require last-minute assembly. Tea sandwiches—especially a crisp English cucumber and smoked salmon version—are a great example of a “high impact, low chaos” hosting choice. They’re visually polished, portioned, and predictable, which is exactly what you want when your counters are already busy.

    To make food prep feel organized rather than frantic, you need two things: clear zones and repeatable storage. Here’s a simple flow that keeps your kitchen tidy even when guests are arriving:

    • Cold zone: Group perishable components together in one bin in the fridge (smoked salmon, cucumbers, spreads). When it’s time to assemble, you grab one bin instead of opening six drawers and three shelves.
    • Prep zone: Reserve one section of counter as a “clean build” surface—keep it empty until you’re ready to assemble.
    • Serve zone: Store platters, toothpicks, and napkins together so you can plate and move items out of the kitchen fast.

    Now connect that back to mason jars: sealed jars can hold dry hosting staples—like tea bags, sugar, crackers, or even mini skewers—so you aren’t digging through crumpled packaging right before people arrive. The common theme is simple: the fewer decisions you have to make in the moment, the calmer your home feels.

    Spring Reset: Outdoor Tool Storage That Actually Stays Organized

    Indoor clutter often has an outdoor origin. Yard tools, batteries, chargers, and accessories migrate into garages, mudrooms, and entryways—then they sprawl. Seasonal deal cycles (like spring sales) push many homeowners to add a string trimmer, blower, or mower to their lineup. That’s great for curb appeal, but it can create a new storage problem if you don’t plan for it.

    One detail that matters for long-term organization is a shared battery platform. Tools that use interchangeable batteries reduce the number of chargers and battery types you need to store. That means fewer cords on shelves, fewer “mystery chargers” in bins, and a smaller footprint overall. If you’re buying or upgrading outdoor tools this season, prioritize:

    • Battery compatibility: Fewer battery families = less clutter and easier maintenance.
    • Convertible functionality: A trimmer that converts to an edger reduces the number of single-purpose tools hanging on your wall.
    • Dedicated charging station: Mount a small shelf or pegboard area near an outlet so charging doesn’t happen on random countertops.

    Actionable tip: the “garage landing strip”

    Create a one-meter “landing strip” inside your garage or by your back door: a hook for gloves, a bin for small parts, and one spot for the charger. This prevents yard gear from drifting into the kitchen or hallway. If your home’s closets are already doing too many jobs (coats plus tools plus sports gear), it’s time to reassign categories using Closet Organizers that separate household storage from outdoor equipment.

    Designing for Calm: Turn ‘Stuff’ Into Systems

    The most stylish homes aren’t necessarily minimalist—they’re intentional. The through-line between a sealed pantry, an easy hosting setup, and a tidy garage is system thinking: you decide what belongs together, where it lives, and how it gets reset. Here are three design-forward principles that keep your organization from unraveling:

    • Make storage visible when it’s useful: Clear jars and labeled bins reduce guesswork. Visibility is a design choice that also prevents overbuying.
    • Hide storage when it’s visually noisy: Chargers, spare batteries, and tool accessories look cluttered fast. Put them behind doors or in uniform, opaque containers.
    • Standardize wherever possible: Repeat jar sizes, repeat bin styles, repeat label formats. Consistency is what makes a system maintainable.

    And if you’re decluttering, use a practical rule: if you can’t explain where an item lives in one sentence, it doesn’t have a home yet. That’s when items start piling up on chairs, counters, and the floor.

    A Quick 15-Minute Reset You Can Do Today

    If you want immediate results without reorganizing your entire house, do this fast reset:

    • 5 minutes: Gather all loose pantry packages (open bags, boxes, partial goods) into one spot.
    • 5 minutes: Pick your top five most-used items and move them into uniform containers or jars; label them clearly.
    • 5 minutes: Choose one “support drawer” for the tools that make the system work—labels, marker, scissors, clips, scoop.

    This small routine creates a visible before-and-after, and it sets the foundation for bigger upgrades later (like adding shelves, bins, or a full pantry zone plan).

    Key takeaway: The best organization wins come from combining airtight food storage, streamlined prep zones for hosting, and smart tool management that prevents garage creep. Start with one system that removes daily friction—then build outward. As you head into the next season, prioritize upgrades that simplify maintenance, not just ones that look good on day one.